
Create or Edit a Booking Page
You can configure a booking page, to do things like change its name or title, link it to a lead form, customize its description, and more.
If you have an existing booking page and are looking to do things like associate services with it and set appointment types and availability, you can instead Customize it.
Table of Contents
Where to Find It
Create a New Booking Page
You can start configuring a new booking page using the +New Booking Page button, found toward the the top-right of your Booking Pages.

Edit an Existing Booking Page
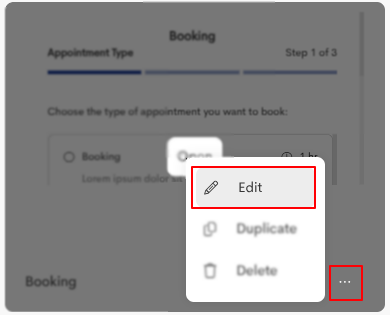
To edit an existing booking page.
- locate it in Booking Pages
-
press its … button then press Edit.
Booking Page Properties

- Name - How the booking page is shown and referred to internally (e.g. in Booking Pages)
- Title - The heading visible to clients when making a booking
- Linked Lead Form - If a lead form is selected, new clients are required to complete this lead form when booking. If set to None, basic information will be gathered instead.
The booking page recognize a client as new if the email address they provide does not match the email of a contact on any client journey belonging to the same business.
If a Lead Form is deleted while still linked to any booking page, that booking page's Linked Lead Form setting will automatically revert to None. This means only basic contact info will be collected for new clients, until you edit your booking page and select a new Linked Lead Form.
- Client Portal - If checked, the booking page appears in the client portal available for clients to book.
- Redirect To (on Complete) - Specify a URL here to redirect users after booking is complete. Useful for custom success pages or tracking.
- Visible to Team Owners Only (only available in a team) - Restricts visibility of the booking page to team owners. When enabled, contributors and participants cannot see or access this booking page in their booking page list.
- Description / Message - Anything entered here will be shown to the client at the top of the page, throughout the booking process.
- Match Labels - You can exclude this booking page from showing in the portal of any clients whose labels don't match the setup you've chosen in the Labels panel below.
- No Matching - Visible to all clients in the portal.
- Any Selected Labels - Page not visible to a client if their journey doesn't have at least one of any labels specified.
- All Selected Labels - Not visible if their journey doesn't have every one of the specified labels.
- Labels - Allows specifying any number of labels that the client must have in order to be able to access this booking page in their portal, based on the matching logic specified above.
Press Save to finish applying these properties.

What to do Next
After configuring your booking page, some things you could do are: