
June 2026
We’re excited to share a new round of updates designed to make everyday tasks in Doulado simpler and more efficient. This release includes improvements to client management, billing, lead forms, team settings, and payer information, giving you more control over how you work and manage your practice.
Check out these updates!
#1: Client and Lead Management
-
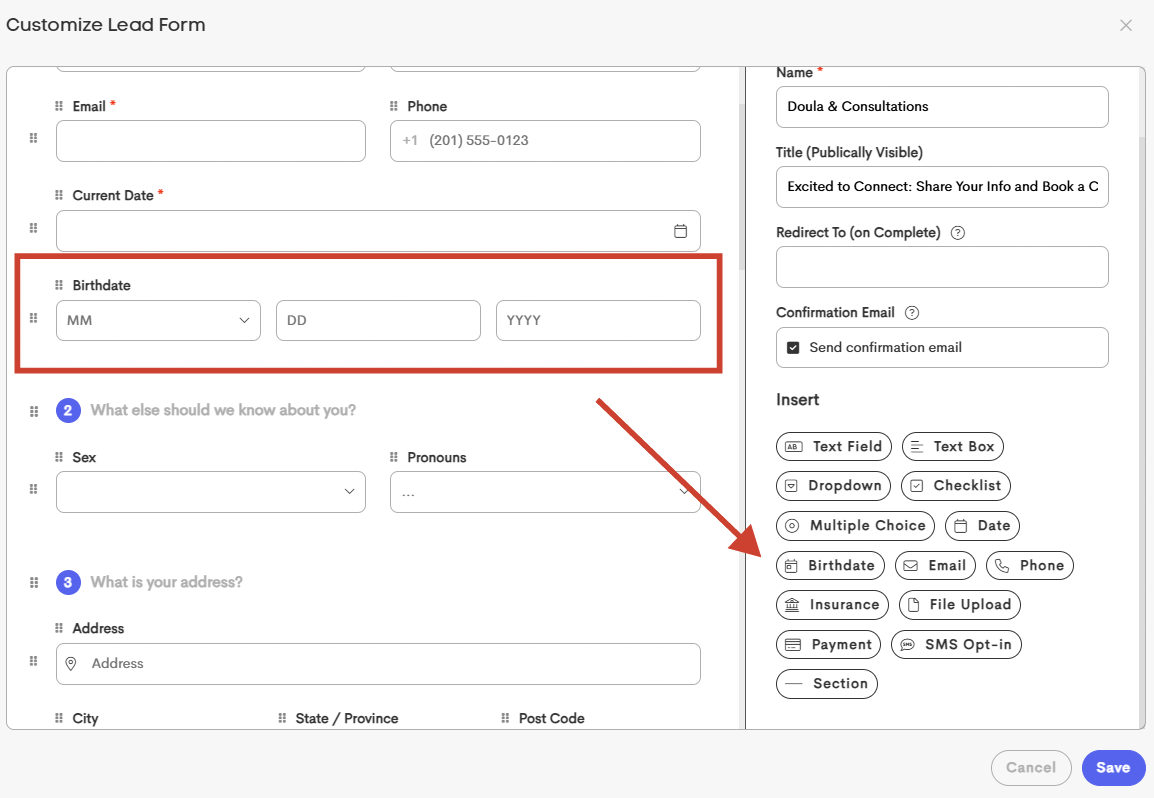
Birthdate fields can now be recreated on lead forms: Lead forms now provide better support for collecting and mapping birthdates.
If a birthdate question is removed initially, you can add it back and continue mapping responses to a client's Date of Birth, making lead form customization more flexible and reducing the risk of losing important intake fields.
-
Customizable Client List Columns: Your client list is now more flexible and personalized! You can choose which columns to display, making it easier to focus on the information that matters most to your workflow.
To customize your view, click the settings icon in the bottom-right corner of the client list and check or uncheck the fields you'd like to display.
- Team Owners can customize the client list view for their entire team.
- Individual Doulas can customize the view within their own client area.

Whether you prefer a streamlined view or need access to additional client details, you can now tailor your client list to fit the way you work.

Optional Client List Columns:
| Profile Picture | The circle image that appears with either the client's initials or their picture (if they have added one) |
| Journey Status | Their current status (Lead, Active, Inactive or Complete) |
| Labels | Their assigned journey labels |
| Date | The most date added in their profile info (Due Date, Delivery Date, Loss/End Date) |
| Open Balance | If they have an open unpaid invoice, the remaining balance will show here |
| Assigned Providers | This will show an icon of any providers assigned to this client journey. It may appear blank if no team members, or other providers are currently assigned. |
| Recent Note | This will show the date of the most recent note added. Clicking on this date in the list will show a pop out preview of that note. If no notes have been added, this will be blank. |
| Next Visit | This will show the date of the next upcoming visit scheduled for this client. Clicking on this date will show the event summary of the visit. If there is not an upcoming visit scheduled, this will be blank. |
| Buttons/Icons | These icons allow you to send a message, edit the client journey or assign it to another provider. If removed from the client visit view, these actions can also be done inside the client journey from various spaces. |

-
Customizable Date Sorting: You can now choose how dates are sorted in the Client List by selecting your preferred date type, including Due Date, Delivery Date, Birth Date, or Loss Date. This can be modified with the client settings at the bottom right of your client list.
By default, the Date column sorts using all available client dates, which can sometimes result in delivery dates appearing before upcoming due dates. With the new Date Column Sort Behavior setting, you can prioritize the date type that matters most to your workflow.
For example, selecting Due Date Only will sort clients by their upcoming due dates and place clients without a due date at the end of the list, making it easier to focus on who needs your attention next.

- New journey icon moved: In order to save space in the main client list, the "New Journey" + icon has been moved inside of a client journey in the "Quick Stats" section at the top right. You can now easily add a new journey by opening the existing client journey.

Archived journeys no longer need to be unarchived in order to start a new episode of care.
You can simply open the archived journey and click the New Journey icon in the Quick Stats section. This will automatically create a new active journey for that client, which will appear in your main Client List. This makes it easy to begin a new set of records while keeping the previous journey safely archived for reference. Read more here!
#2: Billing & Payments
-
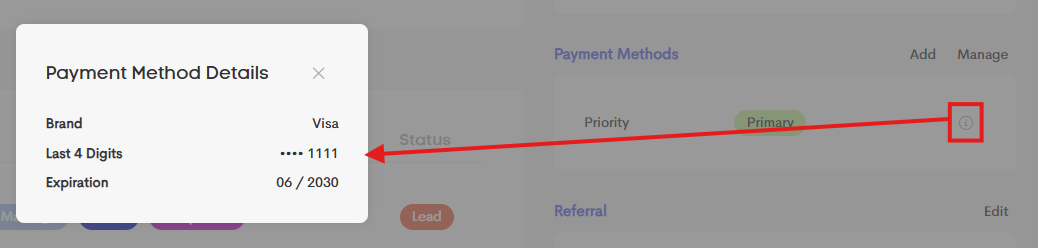
Additional payment method details are now available: You can now view more information about your saved payment methods, including details such as the bank name, routing number, and the last digits of a bank account or card.
This makes it easier to identify and manage payment methods without needing to rely on the nickname alone.
-
Expenses can now be copied: You can now copy an existing expense within the same business instead of creating a new one from scratch each time.
This makes it faster to log repeated or similar expenses, with the copied expense using a new date or defaulting to today.
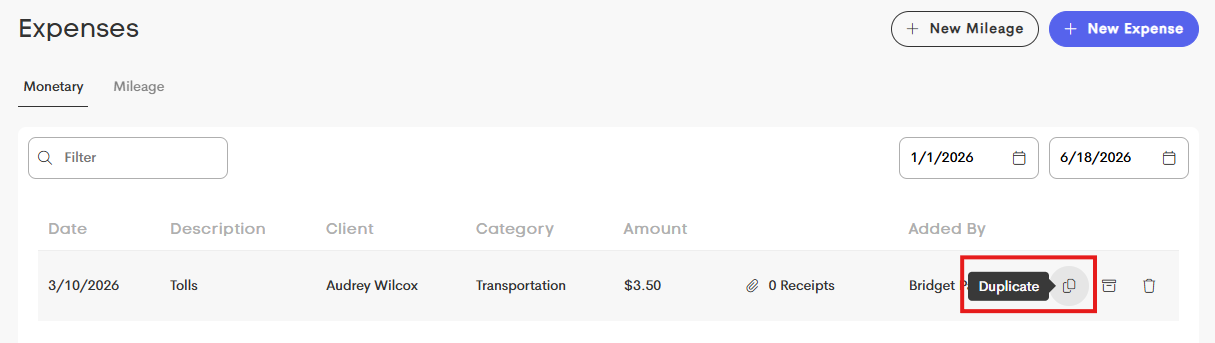
There's now a Duplicate icon in the row actions.


#3: Team Management
-
Team members can manage seat counts: Paying owners can now allow another team member with an Owner role to update the team’s seat count.
This gives teams more flexibility in managing membership while giving an option for other team owners the ability to add or remove team seats. You can manage this in your "Manage Team" settings, while editing an owner's capabilities.
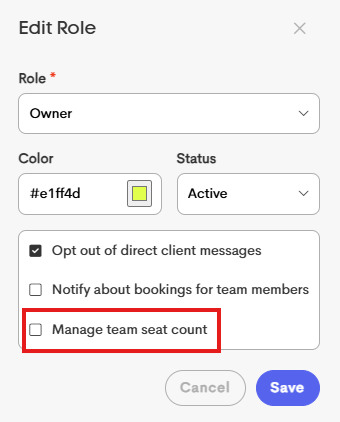

This feature is not available for Contributor or Participant team members.
#4: Payer Enrollment Information
-
Payer service badges are now easier to understand: Payer-related screens now include clearer explanations for service badges, making it easier to understand whether Claims, ERA, or Eligibility services are available, require enrollment, or are not supported for a particular payer.
The tooltip now explains what each badge color and symbol means, helping reduce confusion when reviewing payer capabilities and enrollment requirements.
Important: Service badge colors and indicators reflect the capabilities and enrollment requirements of the payer itself. They do not change based on whether an enrollment has been requested, approved, or activated for your specific NPI/Tax ID combination.
Because organizations may have multiple NPI and Tax ID combinations enrolled with the same payer, enrollment status is not currently reflected in payer badge colors or within the claims dashboard.
If you would like to verify the status of a specific enrollment, please contact support@doulado.co and our team will be happy to assist.

You can just click on the question mark icon beside Services to open the tooltip.
Tasks in the works:
- Workflows and Automations!!! (Some users are beta testing this week!)
- Locked paperwork submissions
- Visit note updates
- and more!