
Creating and Sharing Booking Pages
Doulado provides you with several customization options to personalize your booking pages. To create a booking link, follow the steps below!
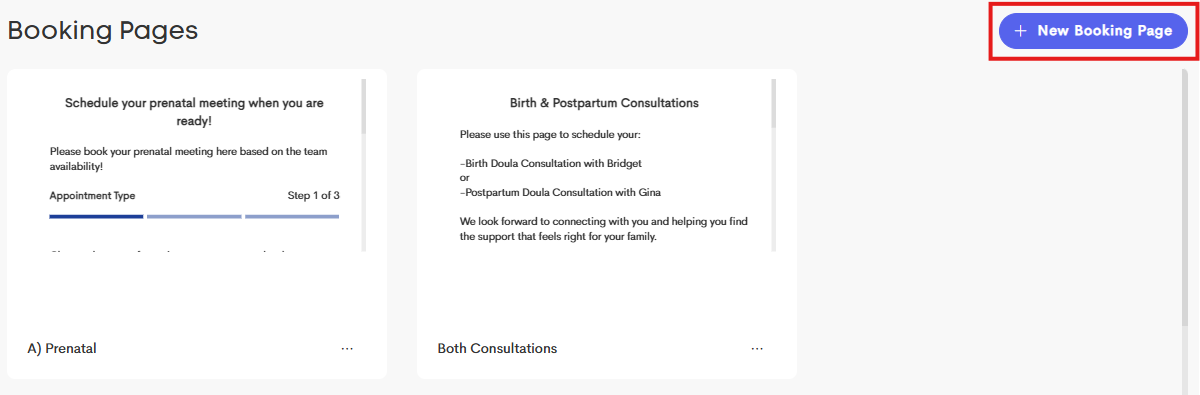
Creating a Booking Page
- Go to the Templates tab and navigate to Booking Pages.
-
Click on the + New Booking Page button.
Fill out the modal with necessary information.
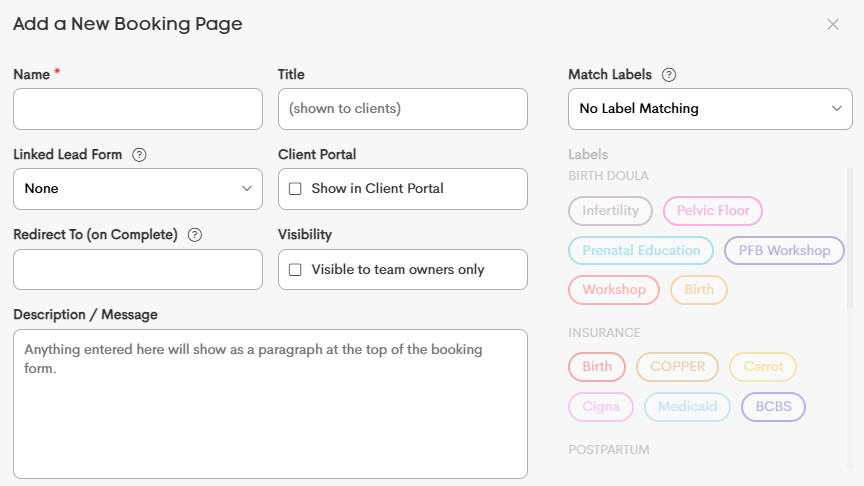
- Name: This will be your reference to identify this new booking page within the Templates list.
-
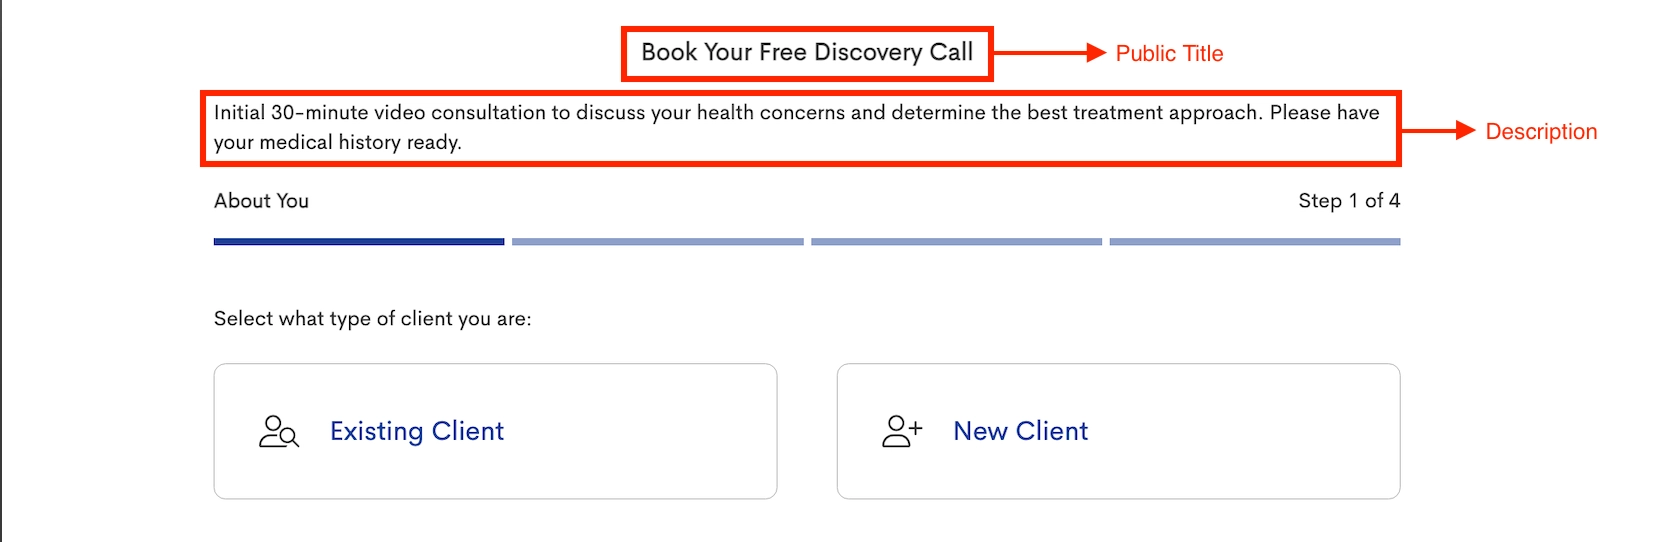
Public Title: The heading displayed to your Clients at the top of the booking form.
Linked Lead Form: Choose a Lead Form from the dropdown, which new clients will complete during the booking process.
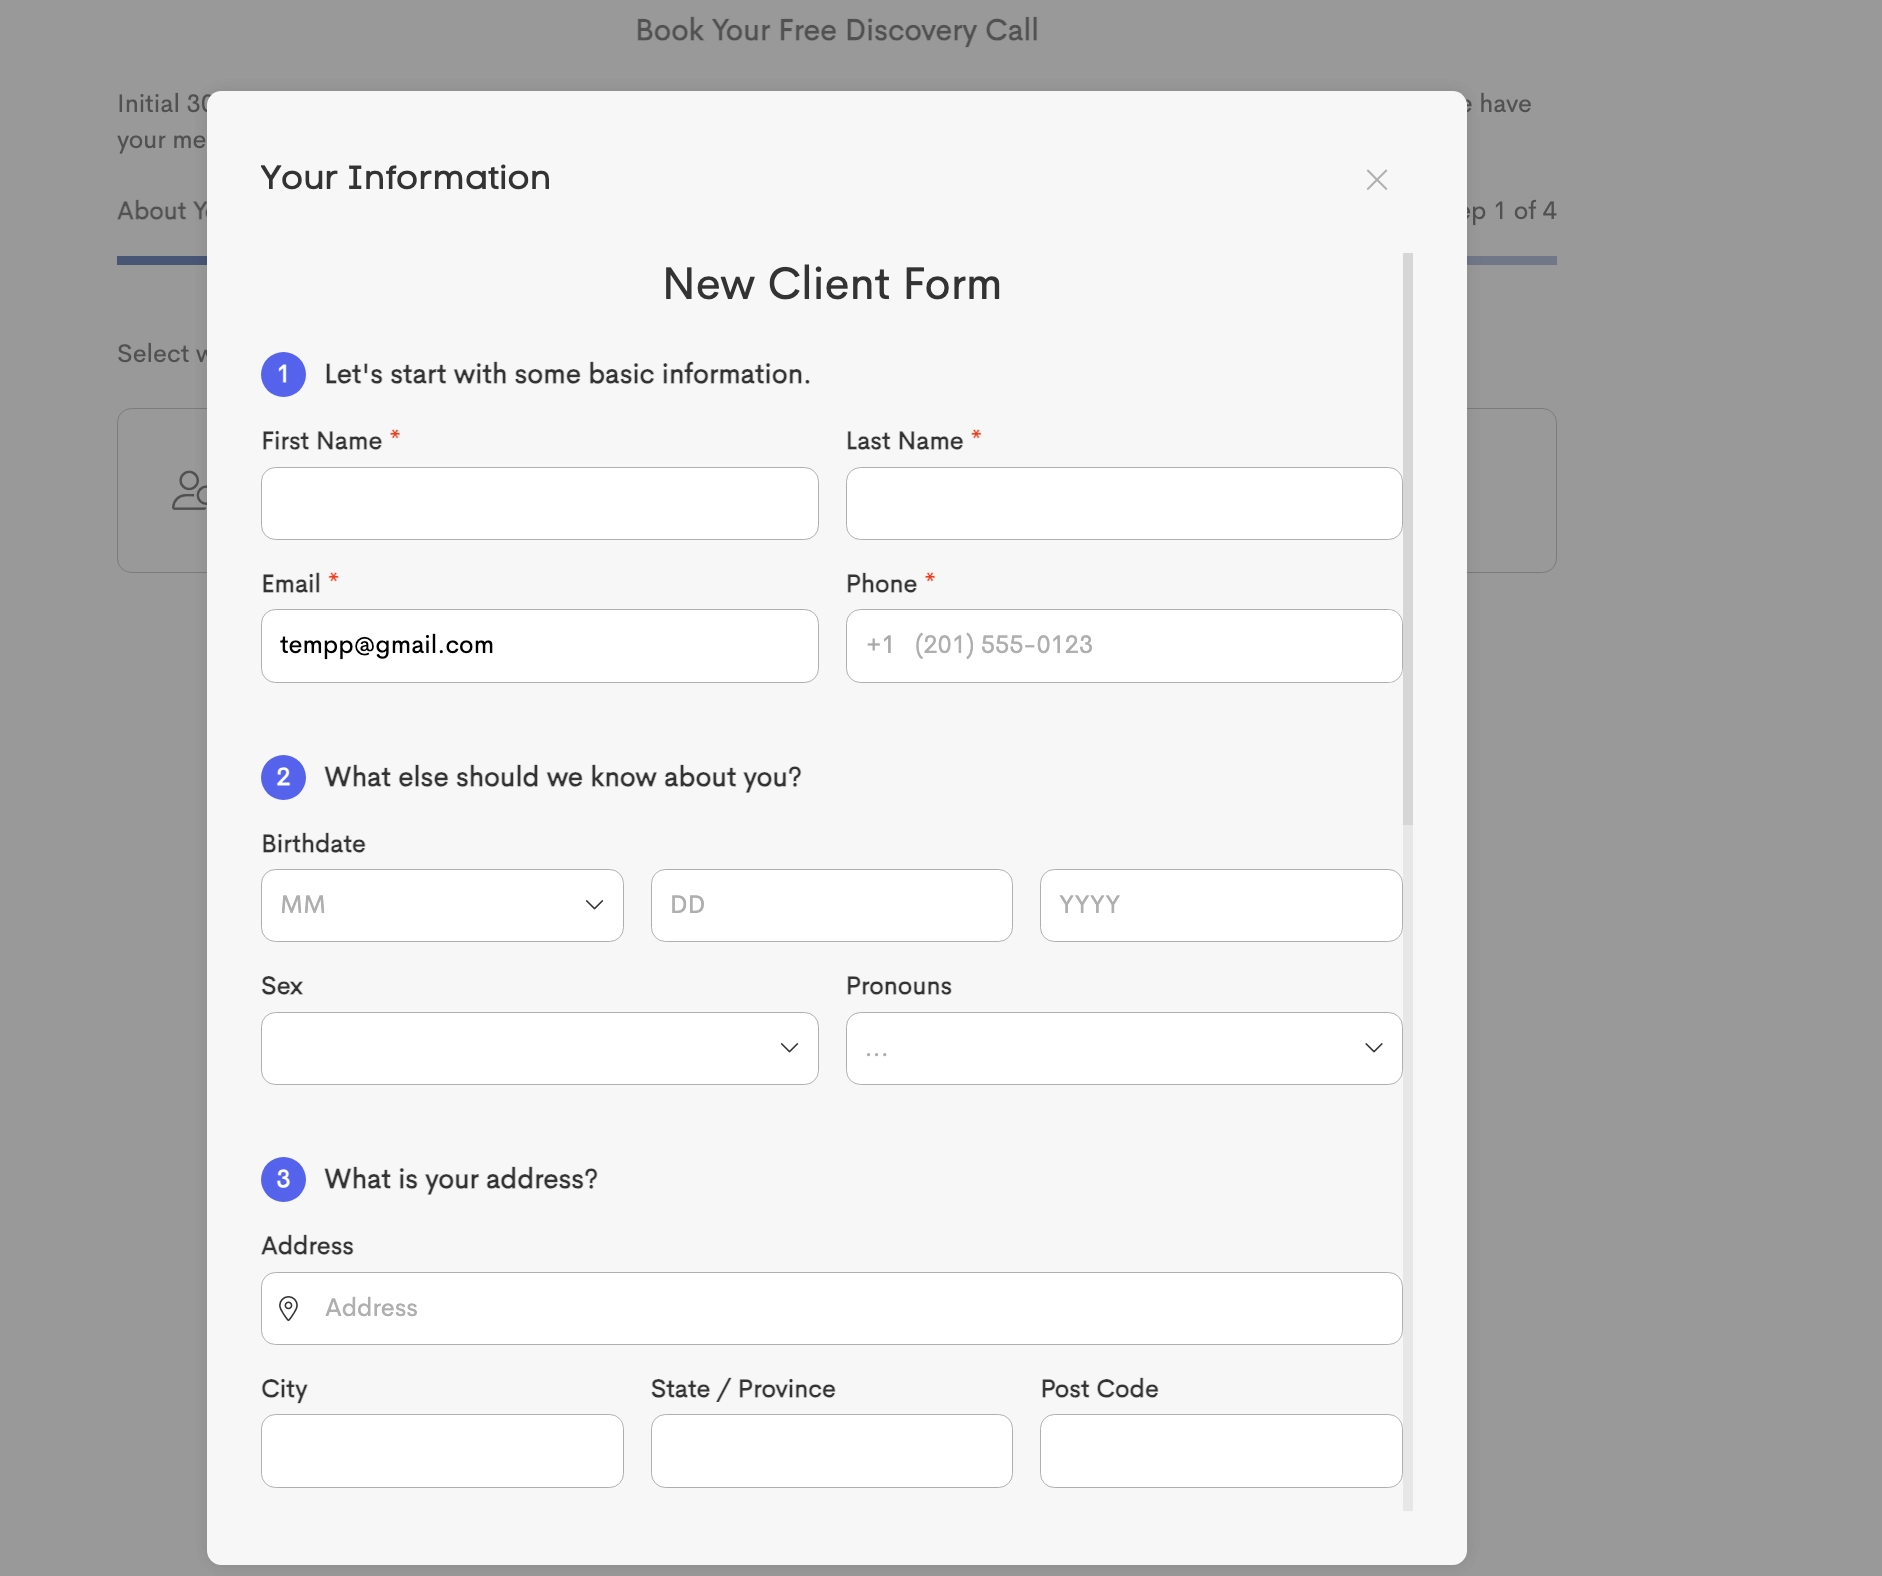
Booking page with linked intake form -
If you select None, only the basic contact information will be gathered (name, email address, phone number).
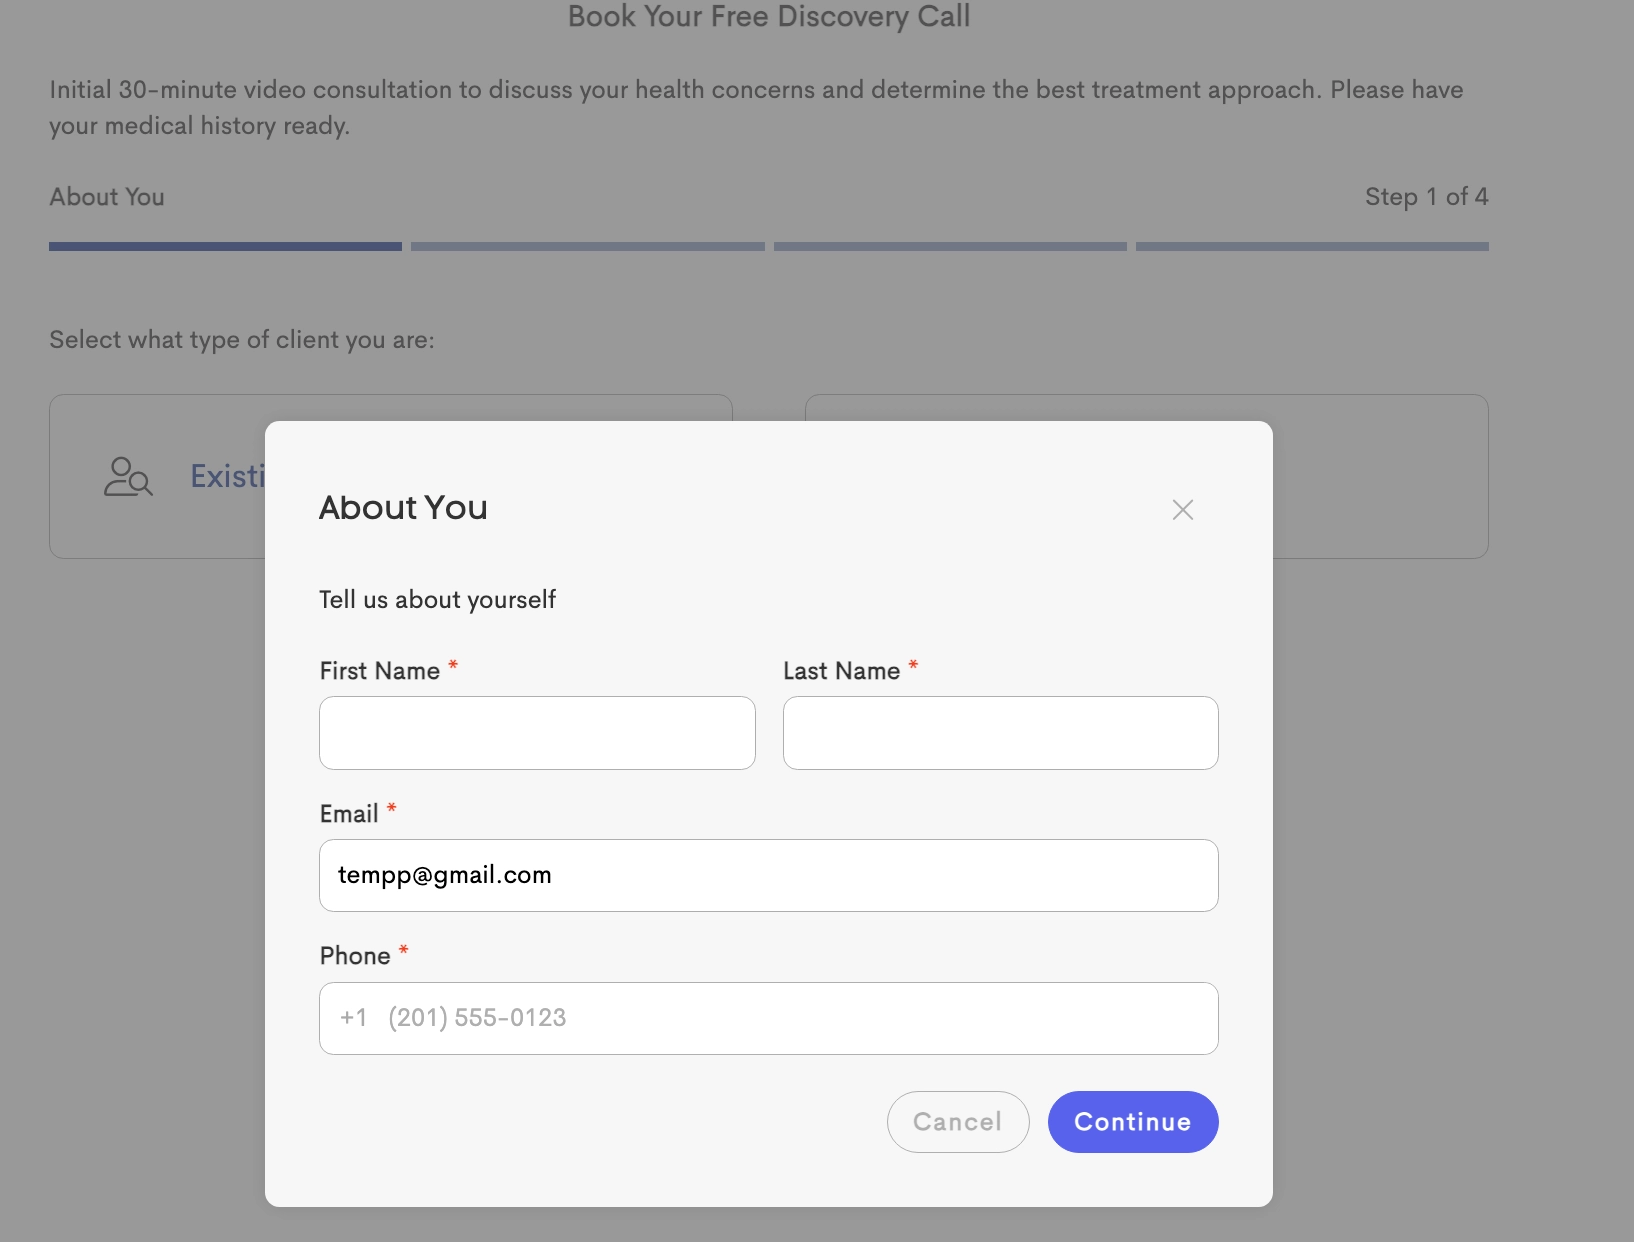
Booking page without linked intake form - Existing clients with a profile will skip the lead form and go straight to booking an appointment.
-
- Redirect URL: You can put an optional web address where your clients will be sent immediately after they successfully finish the booking.
- Visibility: Turn this on to make the booking page accessible only to Team Owners. Contributors and participants will not see it in their list.
- Description/Message: This is your space to add text content displayed as a paragraph of the booking form.
-
Client Portal: When you enable this option, this new booking page will appear in the Client Portal for booking. You can use label matching rules to manage and decide which clients can see the booking page.
Label Matching (Client Portal Filtering): When the Client Portal is toggled, you can restrict the visibility based on the Labels you choose.
- No Matching: Visible to all clients in the portal.
- Any Selected: Visible if the client has at least one of the selected labels.
- All Selected: Visible only if the client has every selected label.


If Lead Form is deleted from the templates library while it's still linked to a booking page, the booking page will automatically revert to "None" (collecting only basic contact info) to ensure the booking link does not break for clients.
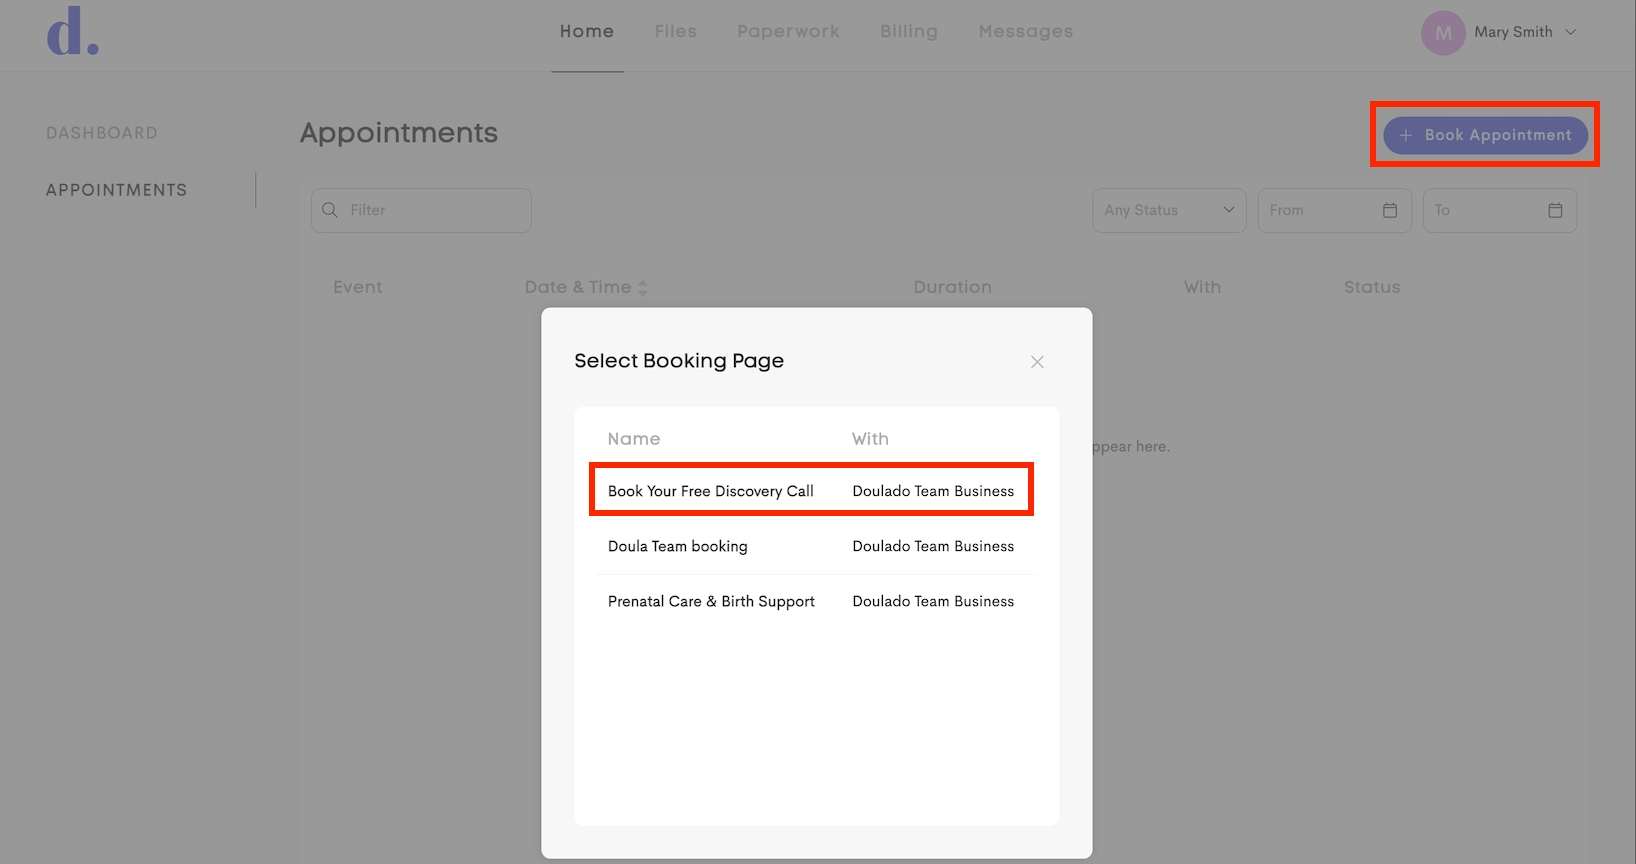
Sharing a Booking Page
Once you're done creating a booking page, click its preview tile from the Booking Pages dashboard to open the sharing modal.

This displays a live preview of the client-facing form and provides two sharing methods.
- Direct Link: A unique URL that you can share directly with clients or post publicly.
- Embed Code: An HTML
iframesnippet that displays the booking form directly on different websites.
In this modal, you can also customize your booking page further, in terms of appointment types and booking timeslots.
If you're done creating a booking page and will now be customizing it, check out this article for more in-depth instructions: Customizing Booking Pages