
Using Labels & Filtering
Labels allow you to group and manage clients based on their needs, services, or status. They also connect to fields, forms, and workflows, helping you keep your data organized and your processes running smoothly.
Table of Contents
- On Client Journeys (Client Profiles)
- Profile Info (Custom Fields)
- Lead Forms (Intake)
- Label Filtering
On Client Journeys (Client Profiles)
You can apply labels to a journey to categorize it; these appear as colored badges on the Client Card.
These labels can be added to a Client Journey in three primary ways
-
Client Table: You can edit the journey via Clients > Edit icon in the row action.
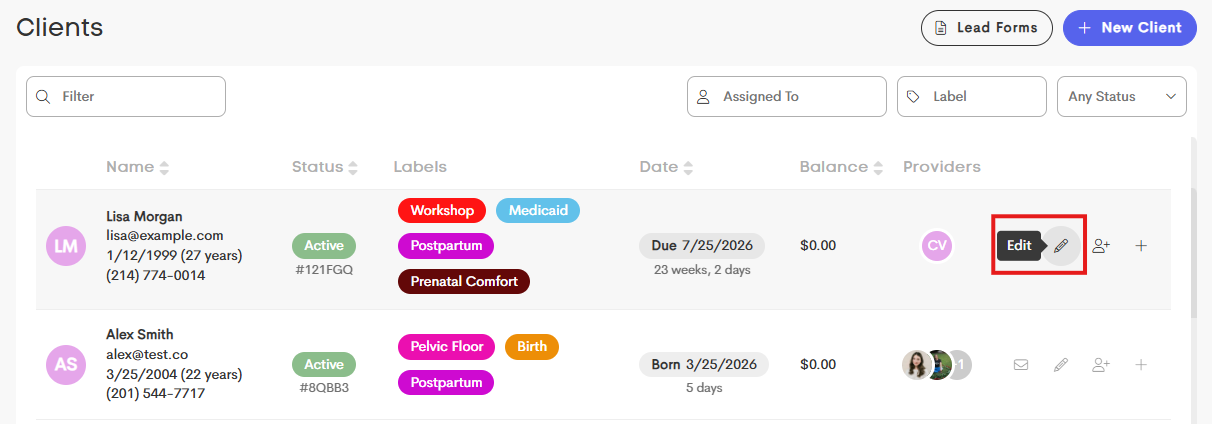
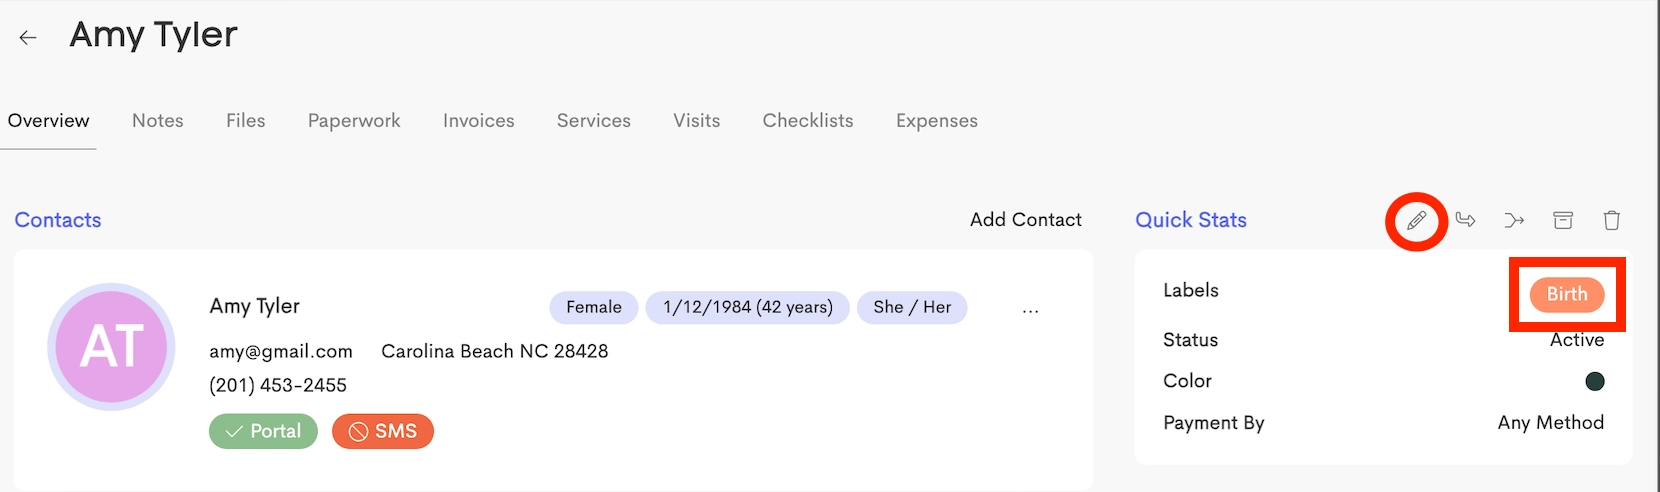
Client Profile: You can go to the Client Profile > Quick Stats > Edit.
New Client Modal: You can assign categories immediately when manually adding a journey on Page 6 of the modal.
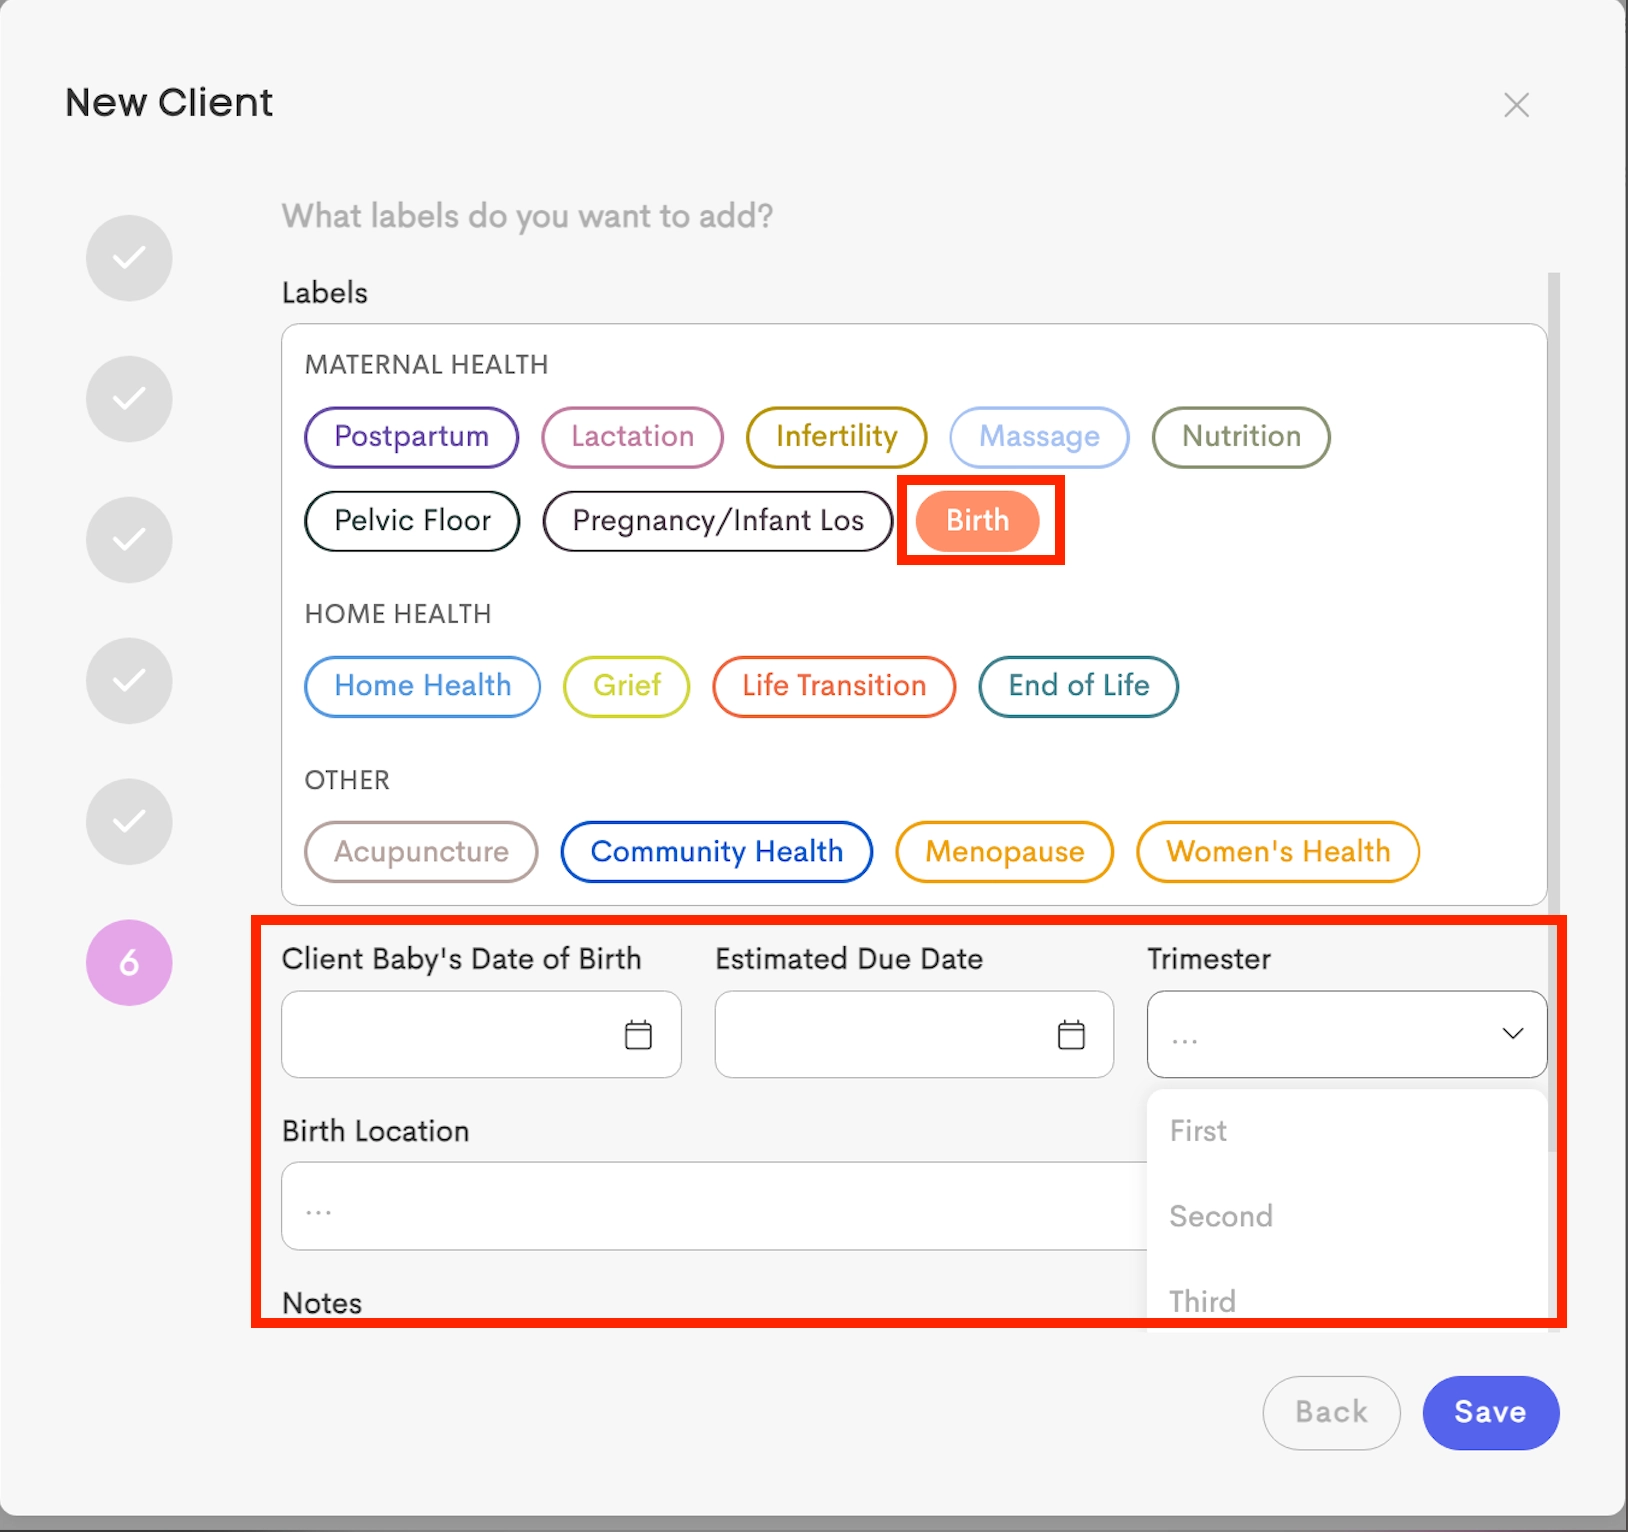
- For a selected label, the corresponding fields added under the same label group are made available to select.


Profile Info (Custom Fields)
Custom fields (Details) appear in the "Profile Info" section of the client profile. Custom fields are not available until a label is applied that belongs to that field's group.

- If applying the "Birth" label (Belonging to the "Maternal Health" group), all fields defined under the "Maternal Health" group will instantly appear under
Namewhen adding details. -
Once you select a field, the optional presets (if added) appear as dropdown values.
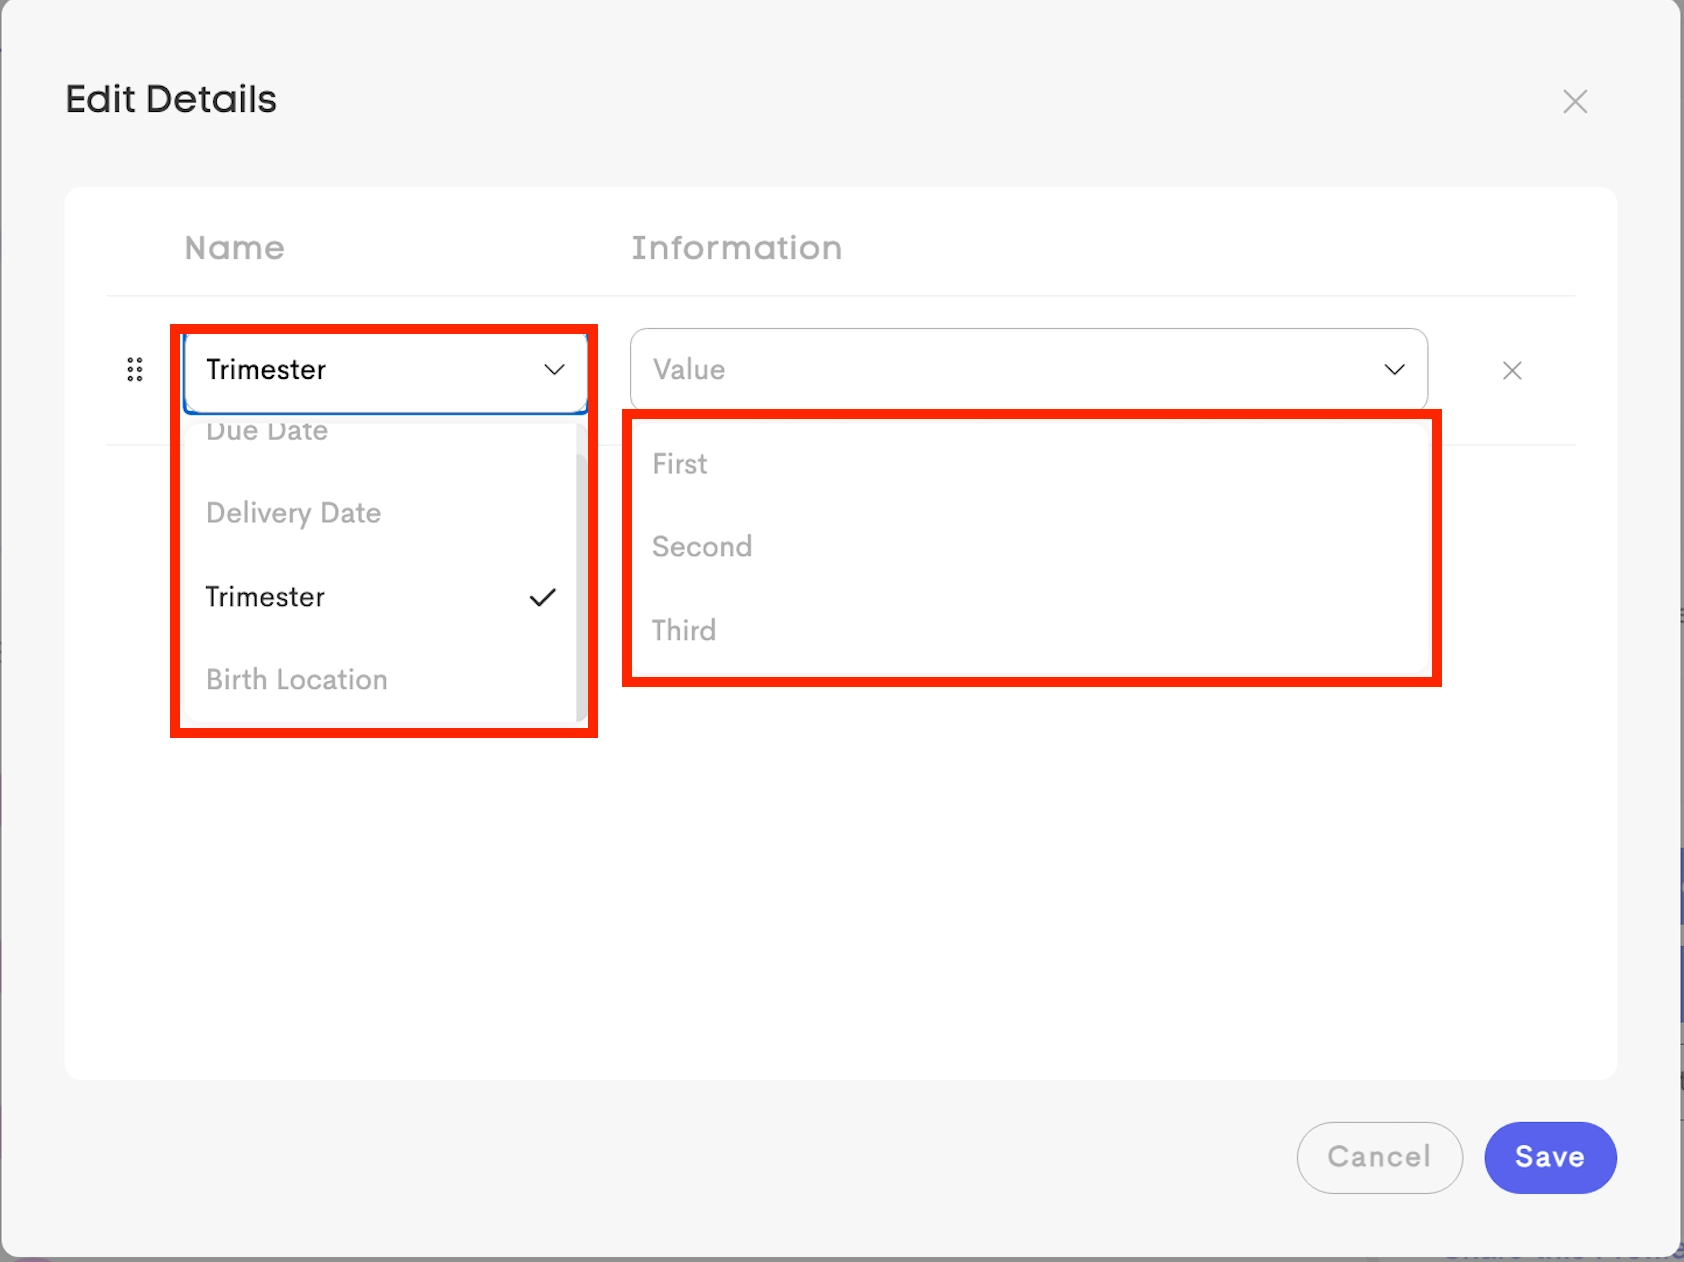
- Fields are displayed in the order specified in the Bulk Management settings.

Certain Special field names trigger automatic calculations on client profiles:
Due Date/Delivery Date: Triggers the Gestational Age calculationBirth Date: Triggers the Baby’s Age calculationLoss Date: Triggers the Days Since Loss calculation


Lead Forms (Intake)
When a label group has a Service Area assigned, the labels under the group appear as checkboxes to include on Lead Forms
When a client selects the corresponding labels, they are automatically attached to their new journey upon submission.

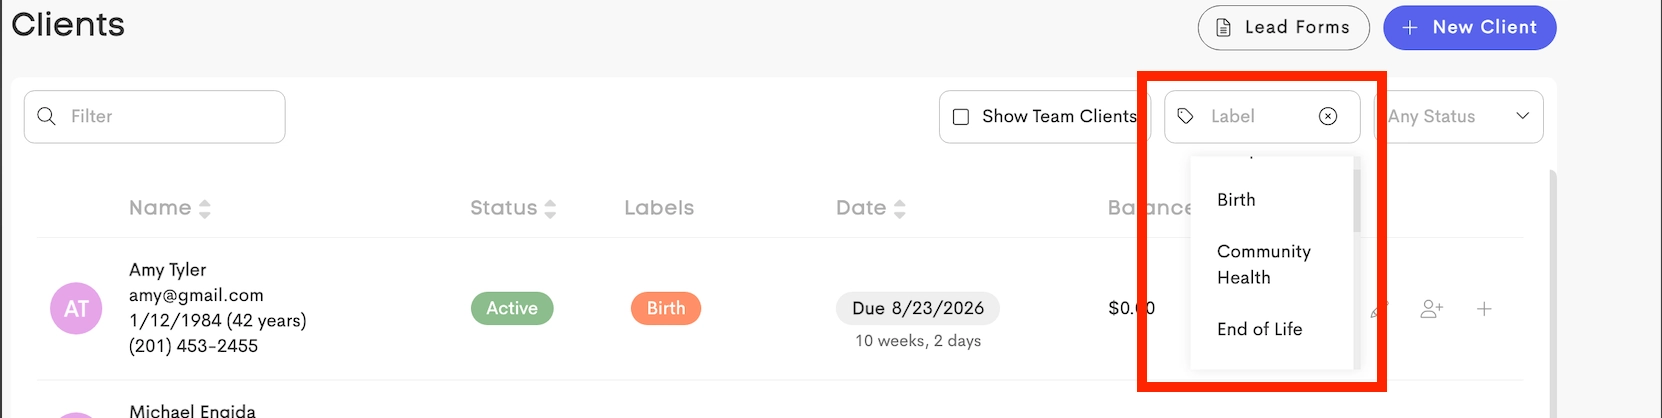
Label Filtering
Labels enable powerful filtering capabilities across large client list.
-
Client Table: Use the filter bar to select one or multiple labels. This allows to quickly identify specific clients.
- Client Selection (Schedulers & Workflows): Usage of labels to determine if a client "qualifies" for a specific selections.

Label Filtering in Booking Pages (Schedulers)
When you create or edit a Booking Page, you can modify the Match Labels settings to control which clients can see it.
- No Label Matching: All clients see the booking page
- Any Selected Labels: Client must have at least 1 selected label
- All Selected Labels: Client must have every selected label

Label Filtering in Workflows
Workflows with automatic triggers use labels to add clients into the workflow. Any journey that is tagged with those matching labels is automatically added to that workflow.
