
Managing Labels & Fields
Label Groups, Labels, and Fields work together to help you categorize clients and collect relevant information.
This article walks you through how to set them up and manage them to support your workflows.
Table of Contents
Managing Label Groups
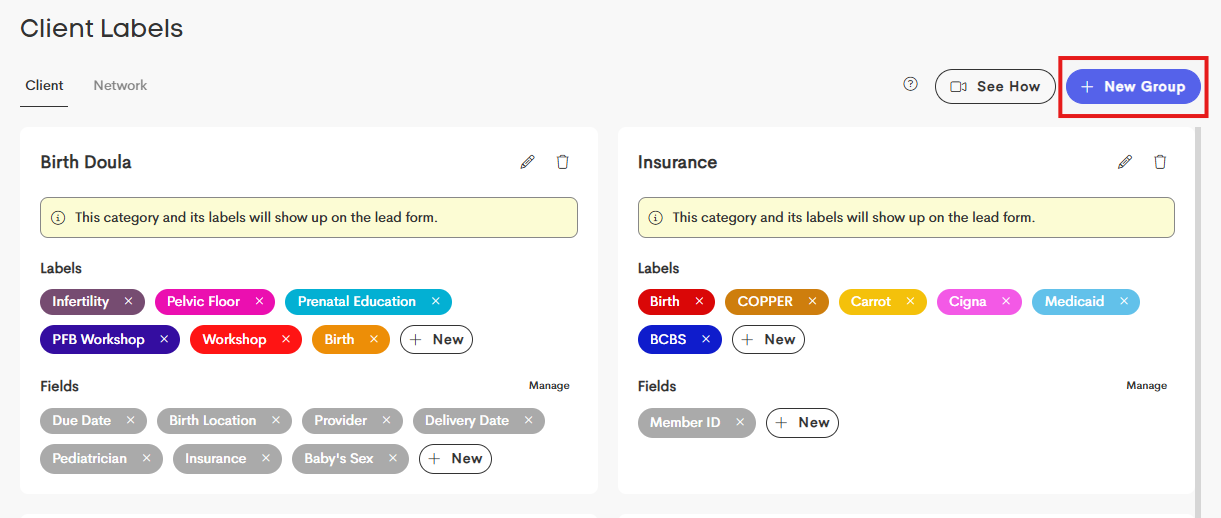
You can create, edit, or delete label groups from the main Labels page.

Deleting a group removes all associated labels and fields. However, existing client assignments will not be cleared.
Creating a New Label Group
-
In the Labels page, click on the + New Group button.
-
Assign a name for the group and choose a Service Area for the group.
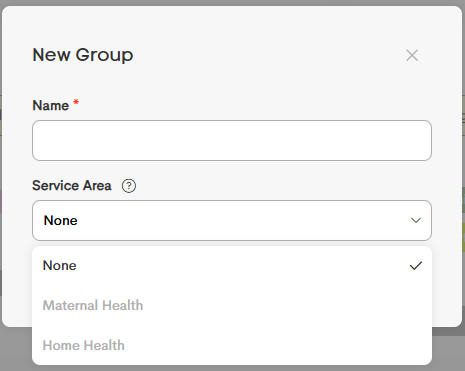
- Click on Save to add the label group to the dashboard.


Editing an Existing Label Group
-
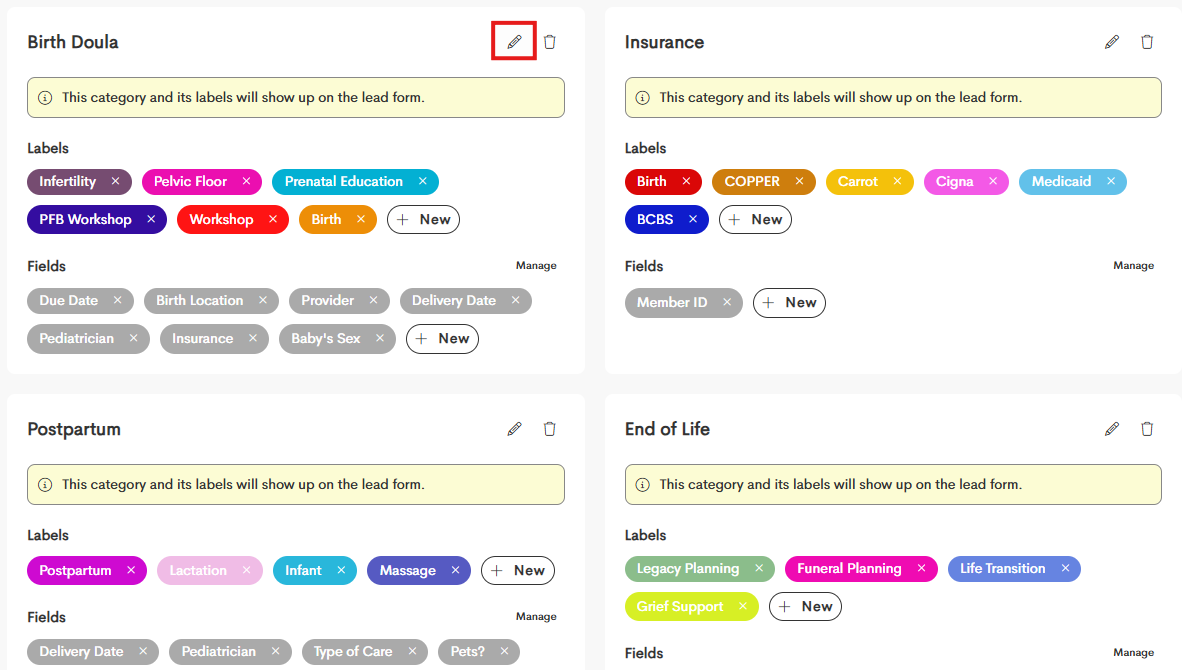
Choose a label group from the dashboard and click on the Pencil icon on the tile's top-right corner.
-
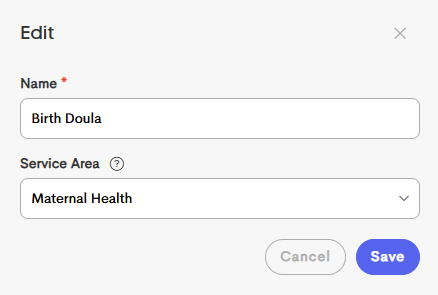
You can set another name for that label group or modify the Service Area it caters to.


A Service Area helps organize your services and determines how labels, templates, and lead forms work together in Doulado.
When a Service Area is assigned to a label group:
- Related labels can appear as selectable options on lead forms
- Selected labels are automatically applied to a client’s journey
- Matching templates become available in your library
- Click on Save once you're done.
Managing Labels
Labels can be created within any group. These visual tags appear as colored badges on client cards and can be applied to journeys to categorize them.
Adding a New Label
- Click + New in the category you are working in to add another label.

- Enter the Label Name.
- Choose a Color for easy identification.

You can also edit existing labels by clicking on them to edit the name and/or color.
Managing Fields
Fields are custom data fields that collect specific information for clients with labels from that group.
When adding fields to a group, you're defining what information should be collected for journeys that have labels from that group.
Creating a New Form Field
- Click + New in the category you are working in.
- Enter the field name (ex. Provider Name, Birth Location, Emergency contact, etc.)
- Each label category can have different form fields attached to that category. You may want to have different custom fields populate in a profile depending on their label (service type).

Optional Presets: When creating a field, you can define a list of standard options (one per line). These options appear as a dropdown menu when editing client details, ensuring data consistency.

Bulk Management of Fields
You can easily customize the order of fields and how they will appear in the Client Profile Info section by managing the fields in each category by selecting Manage and moving them around in the order you prefer.

- In a Label Group, click on the Manage option parallel to Fields.
- Drag the fields according to the order you want them to be displayed on client profiles.

- Click on Save once done.
When form fields are edited in this section, it does not effect already created profiles.
If you add a label to an already created profile, the form fields will not automatically populate, but the names will appear in a dropdown when editing the profile info to add them if needed.