
Tax Prep: Exporting Your Data
Doulado is NOT an accounting system and we would still recommend a professional tax preparer as needed.
Keeping track of your income and expenses is essential for tax preparation. Within Doulado, you can efficiently retrieve the necessary data from both the Payments and Claims Remittance sections as well as export all of your tracked Expenses.
Doulado allows you to track two types of income: payments from out-of-pocket clients and claims remittance. The details of how to export that data from each income type are outlined below.
Exporting Your Payment Data
- Navigate to the main Billing tab, and select Payments.
- In the upper right-hand corner, click on the Export option.

- The Export Payment dialog box will open, allowing you to select the desired date range for the payments you wish to export.

-
Once exported, an Excel spreadsheet will be generated containing all relevant payment data.

From that spreadsheet, you can easily total up your processing fees and net payments by adding a=sum equation at the bottom of each column!
Exporting Claims Remittance Data
Claims Remittances: If you have Electronic Remittance Advice (ERA) set up or manually record claim payments, these payments are tracked and recorded in Doulado.
Check out this article for more information about setting up ERAs: Electronic Remittance Advice (ERA)
- Navigate to the main Billing tab and select Claims from the left-hand menu.
-
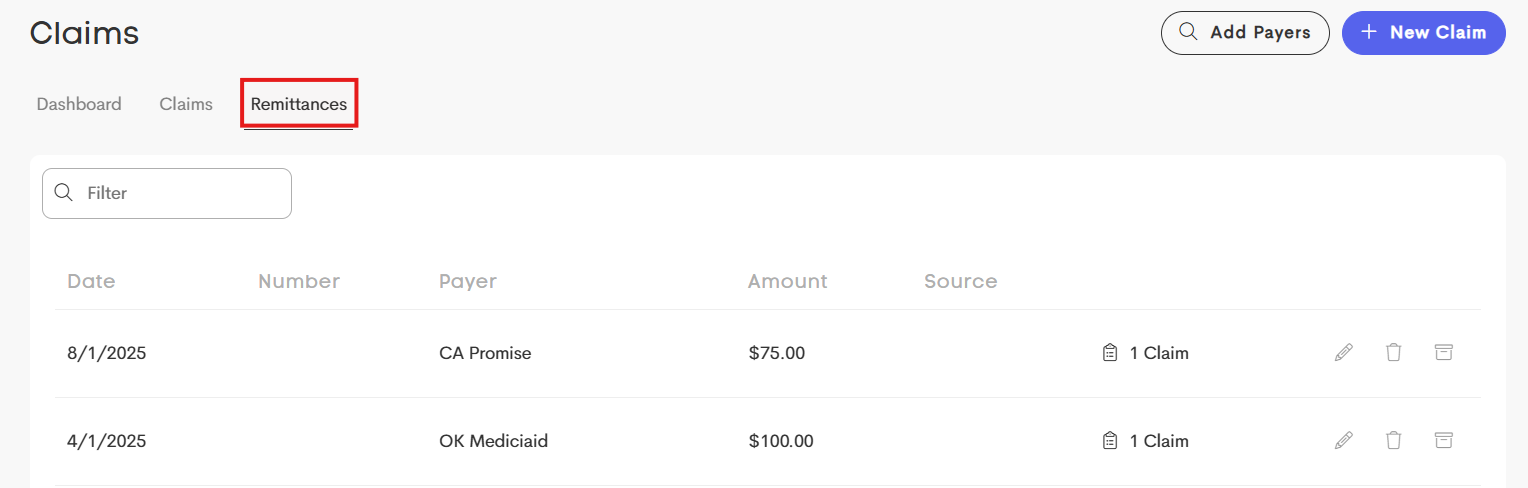
Click on the Remittance tab.
-
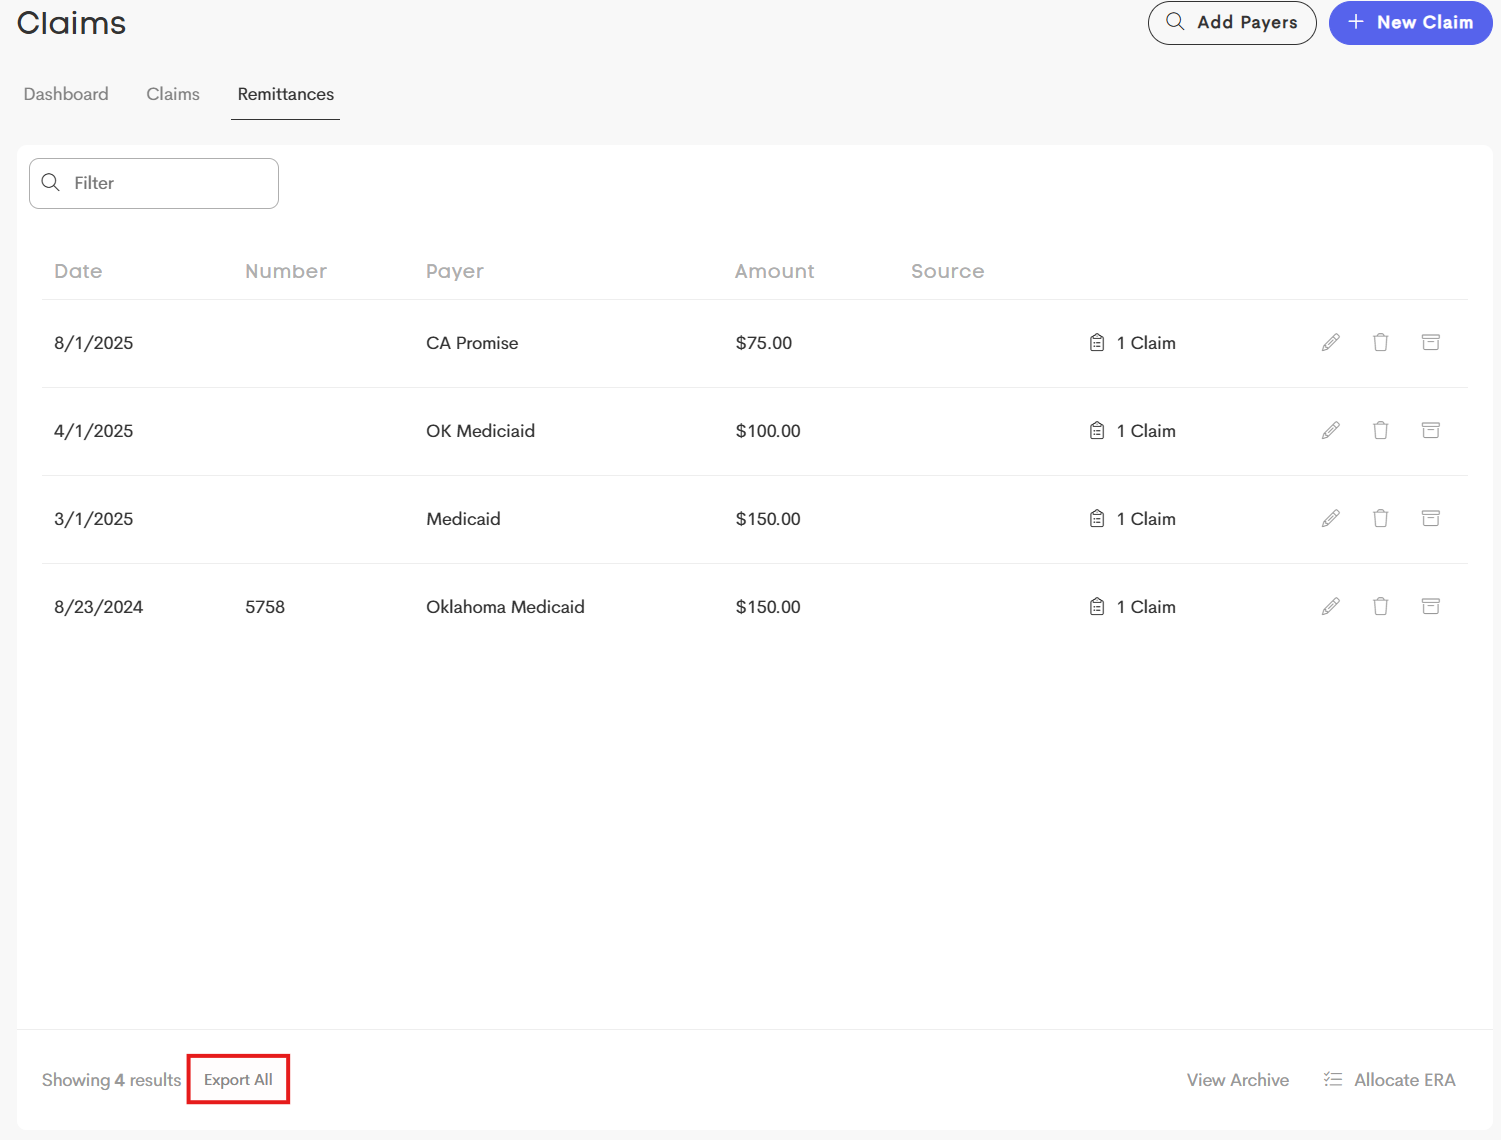
At the bottom of the Remittances page, click on Export All.
-
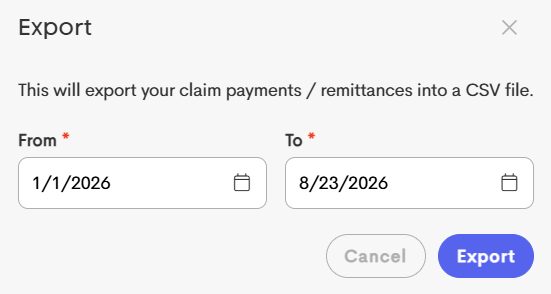
The Export window will open. Enter the date range you want to export remittances from, and click on the Export button.
- An Excel spreadsheet will be generated containing all claims payment details.
Exporting Your Expense Data
Expense Tracking: Tracking your business expenses is equally important for tax reporting. Doulado allows you to export your expenses with ease.
- Navigate to the main Billing tab > Expenses.
-
In the upper-right hand side, enter in the date range for the data you want to export.
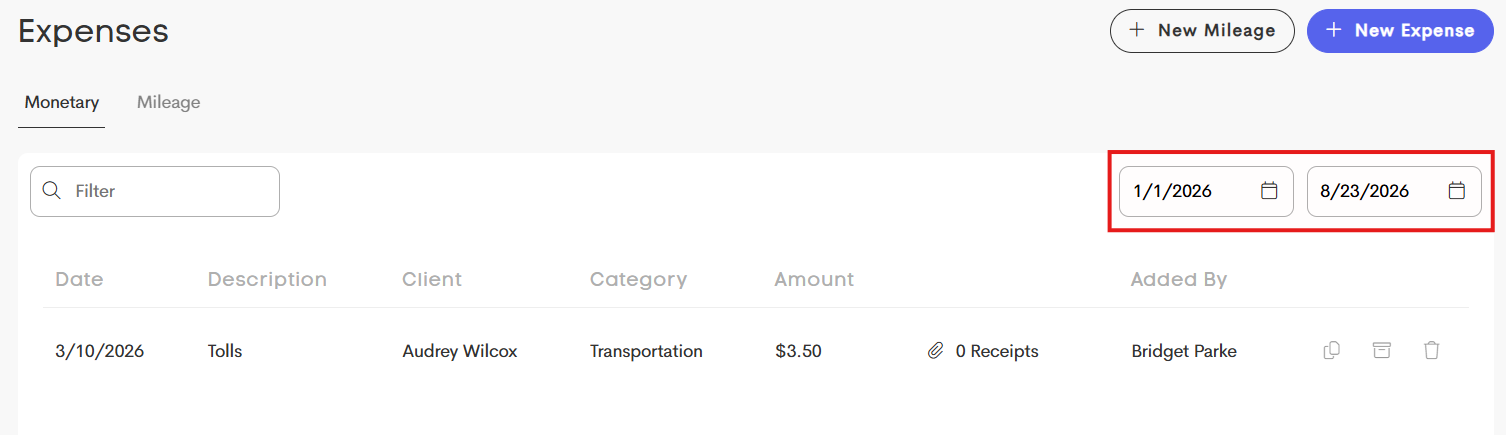
- Click on Export All at the bottom of the screen.
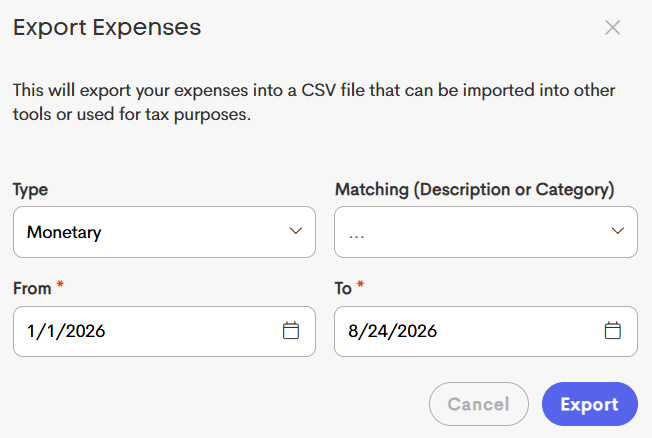
- In the Export Expenses window, modify the details according to the export data you want to get.
- Type: Choose whether you're exporting Monetary, Mileage, or both of these expense types.
- Matching: Select a matching category.
-
Date Range: Enter the date range you want to get the expense data from.
By following these steps, you will have a comprehensive record of your income and expenses, making tax preparation straightforward and efficient.
