Workflows: Creating & Setting Up a Workflow
Workflows are built by creating phases that represent different stages of a client’s journey. Start by creating your Workflow, then add and organize phases and tasks to define how clients will move through the process.
Workflows, phases and tasks can be created, configured and deleted by team members with the 'Owner' or 'Contributor' role.
Creating a New Workflow
To create a new workflow:
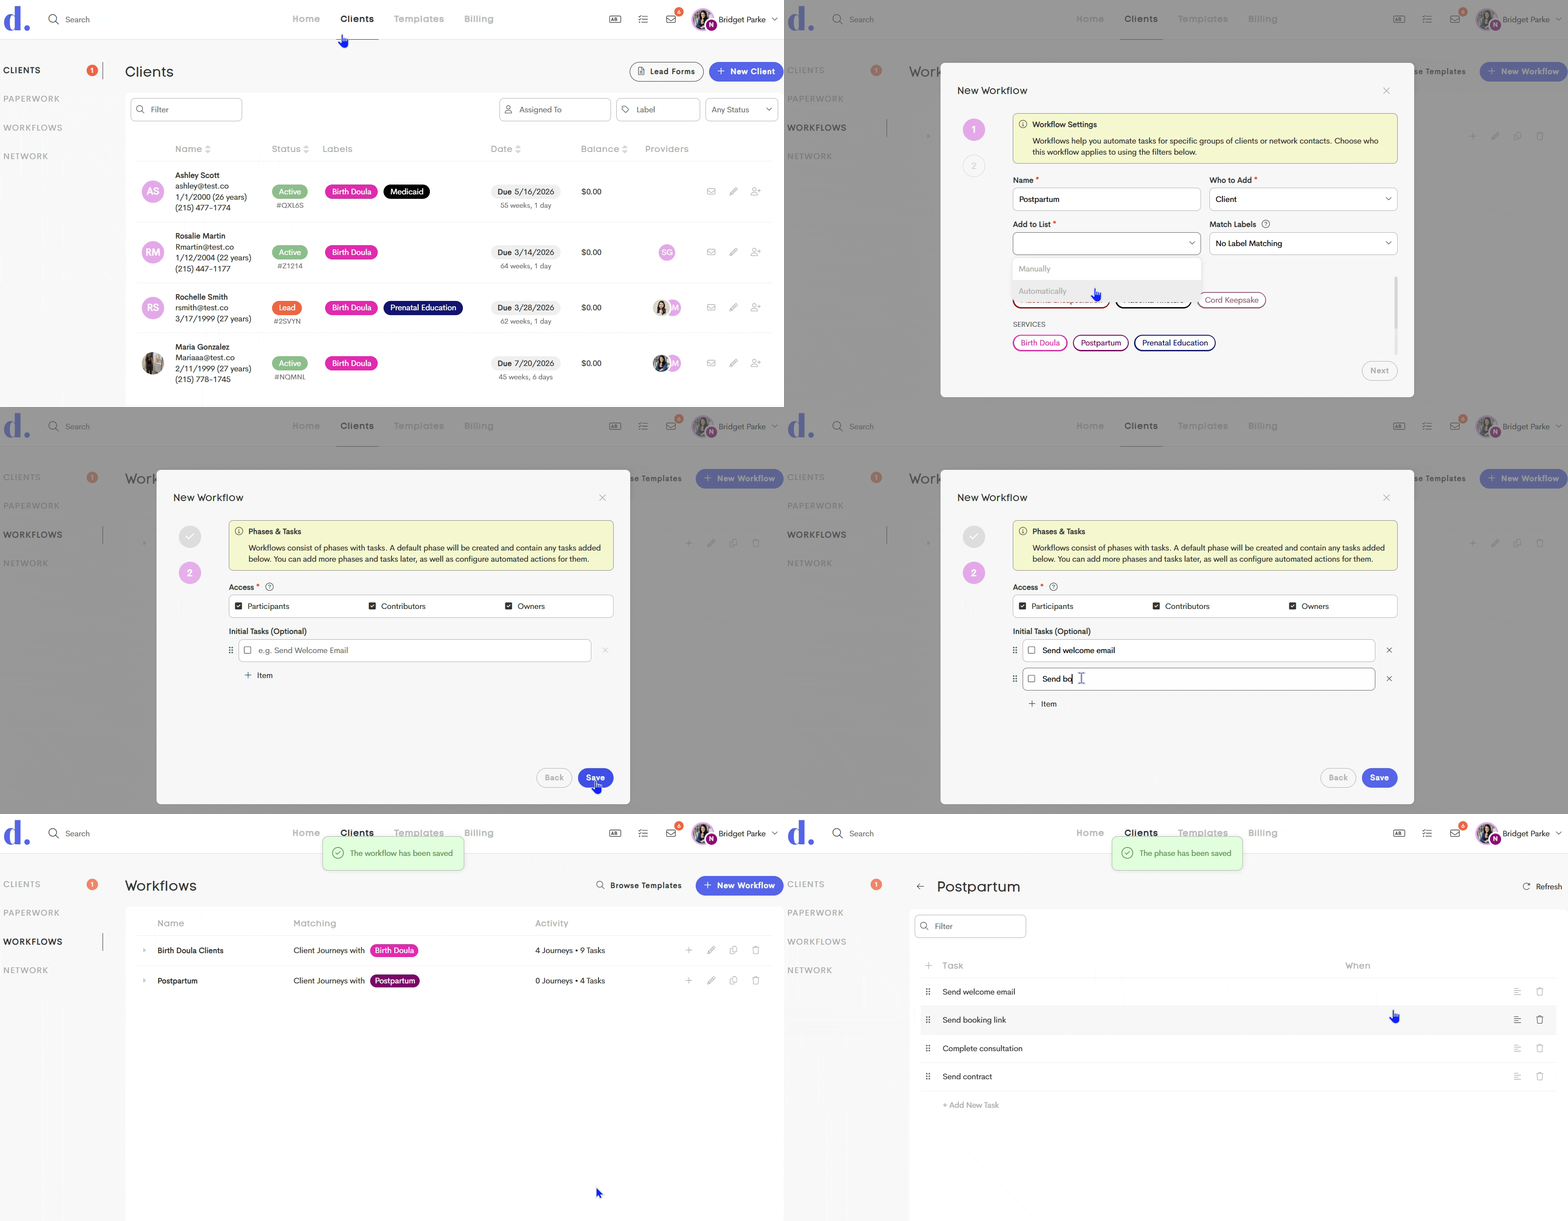
- Navigate to the Clients tab, and then Workflows on the left hand menu (previously checklists)
- Click + New Workflow
- Enter a name for your workflow (e.g., Prenatal Care, Postpartum Support, End of Life care)
- Select who to add, how to add them, and any matching statues or labels that would pull them into this workflow
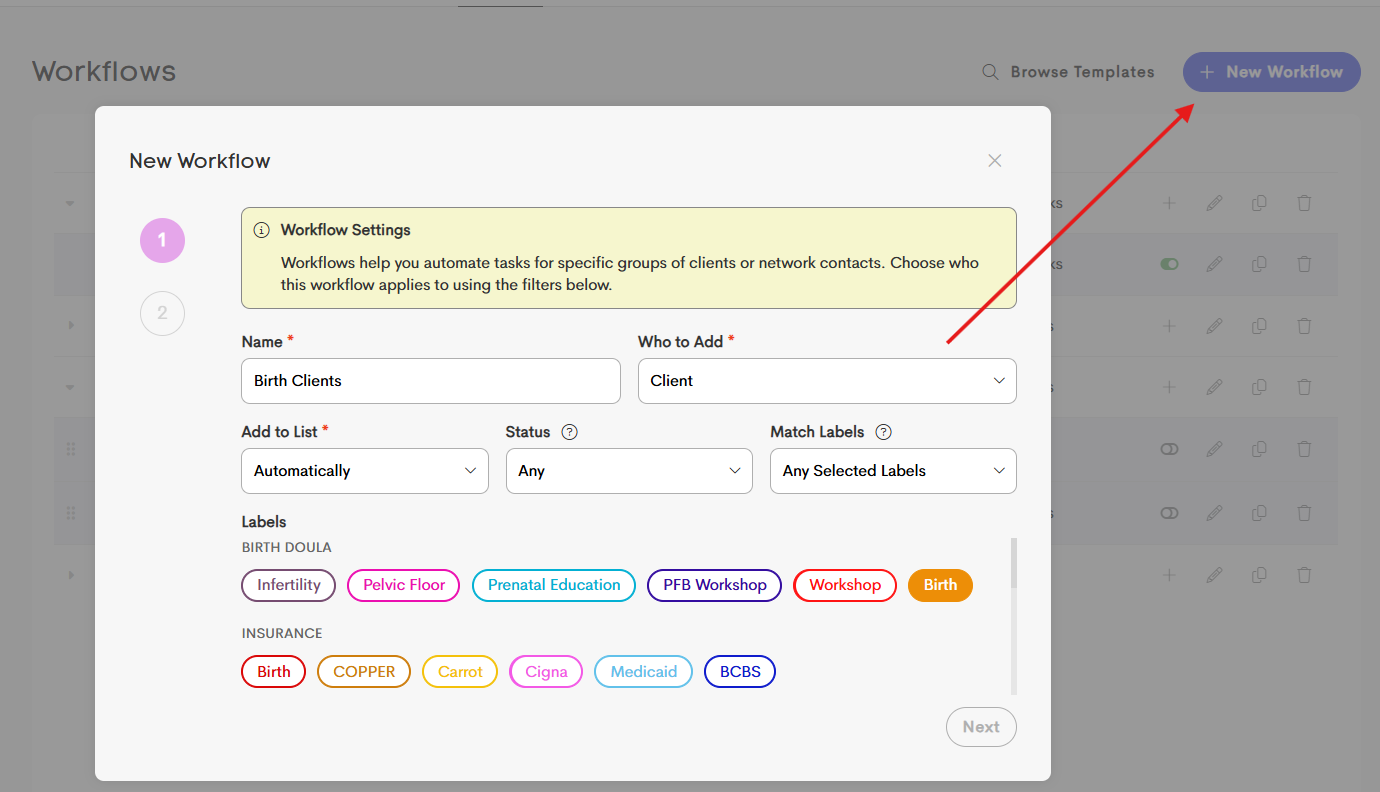
- Click Next to assign access permissions, add any tasks to the initial phase. Adding or editing tasks can be edited or completed later as well.
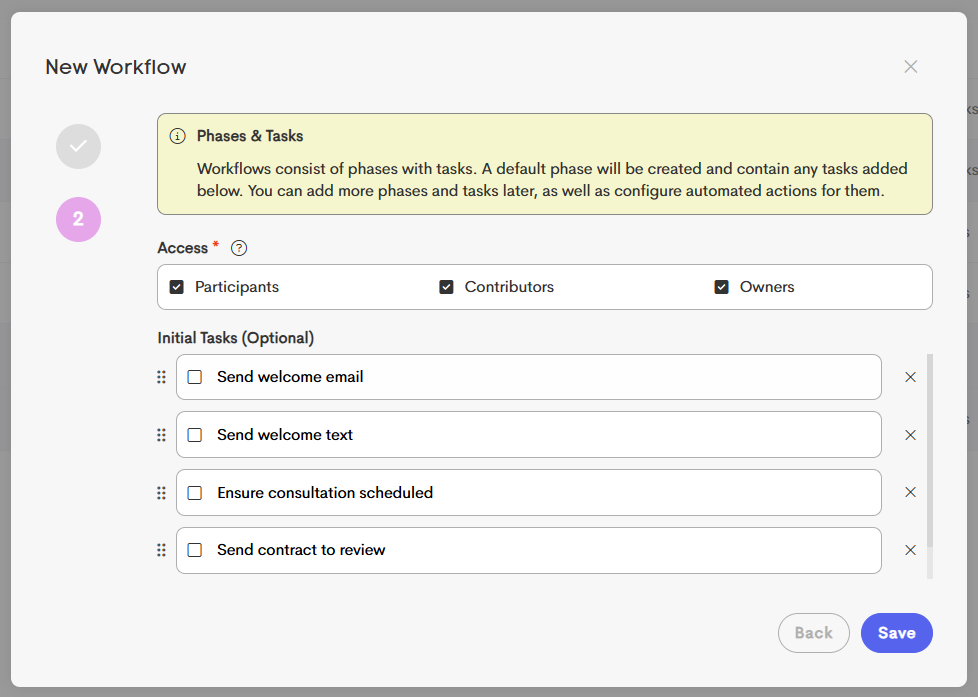
- Click Save, and now your workflow will now appear in your workflow list, ready to be built out with phases and tasks.
Adding and Editing Phases
Phases represent the different stages of a client’s journey within a workflow. For example, a prenatal workflow might include phases such as Intake, Second Trimester, 36 Weeks, and Postpartum.
Add a Phase
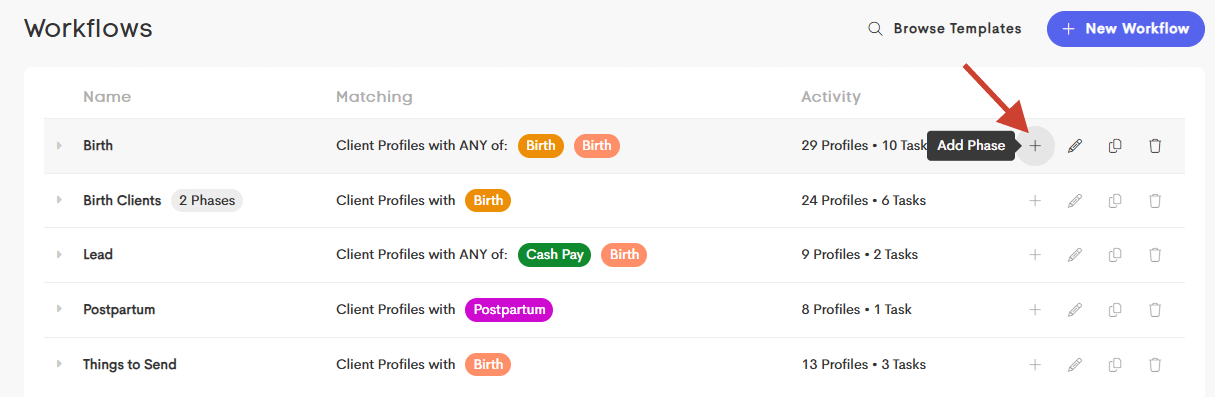
- Click the + icon to add a phase to your workflow.
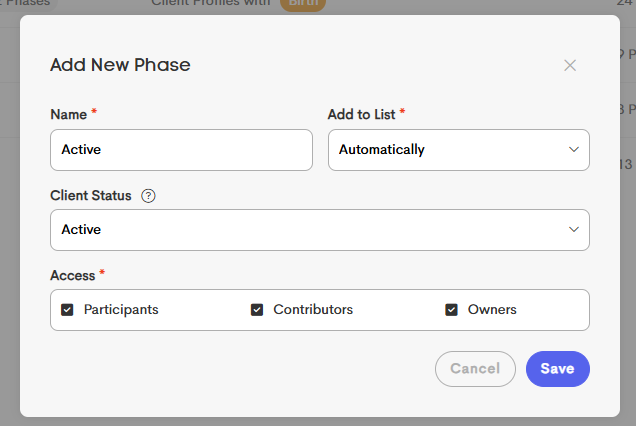
- Enter a name for the phase, select how clients should be added to the phase, and choose the associated status.
- Click Save.
Edit a Phase
To edit a phase's basic settings, click the Edit icon on the phase row. From there, you can update the phase name, associated status, and access settings.
If you need to rearrange tasks or modify task actions within the phase, you'll first need to pause the phase:
- Click the On/Off toggle on the phase row to pause the phase.
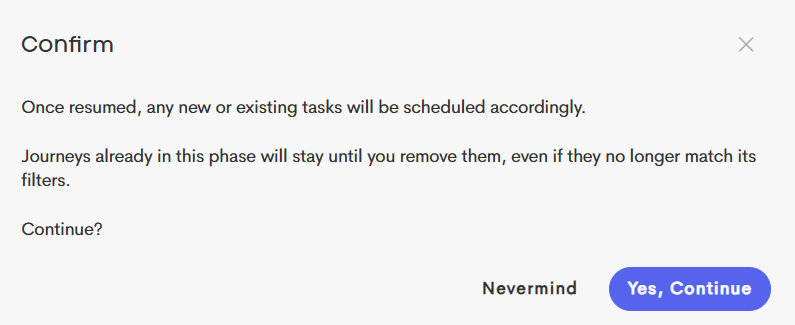
- Confirm that you want to temporarily pause all actions while you make changes.
- Click the phase row to open the phase details.
Once inside the phase, you can:
- Rearrange tasks by dragging them using the Grab icon.
- Edit a task by clicking its title.
- Configure task actions and automation settings.
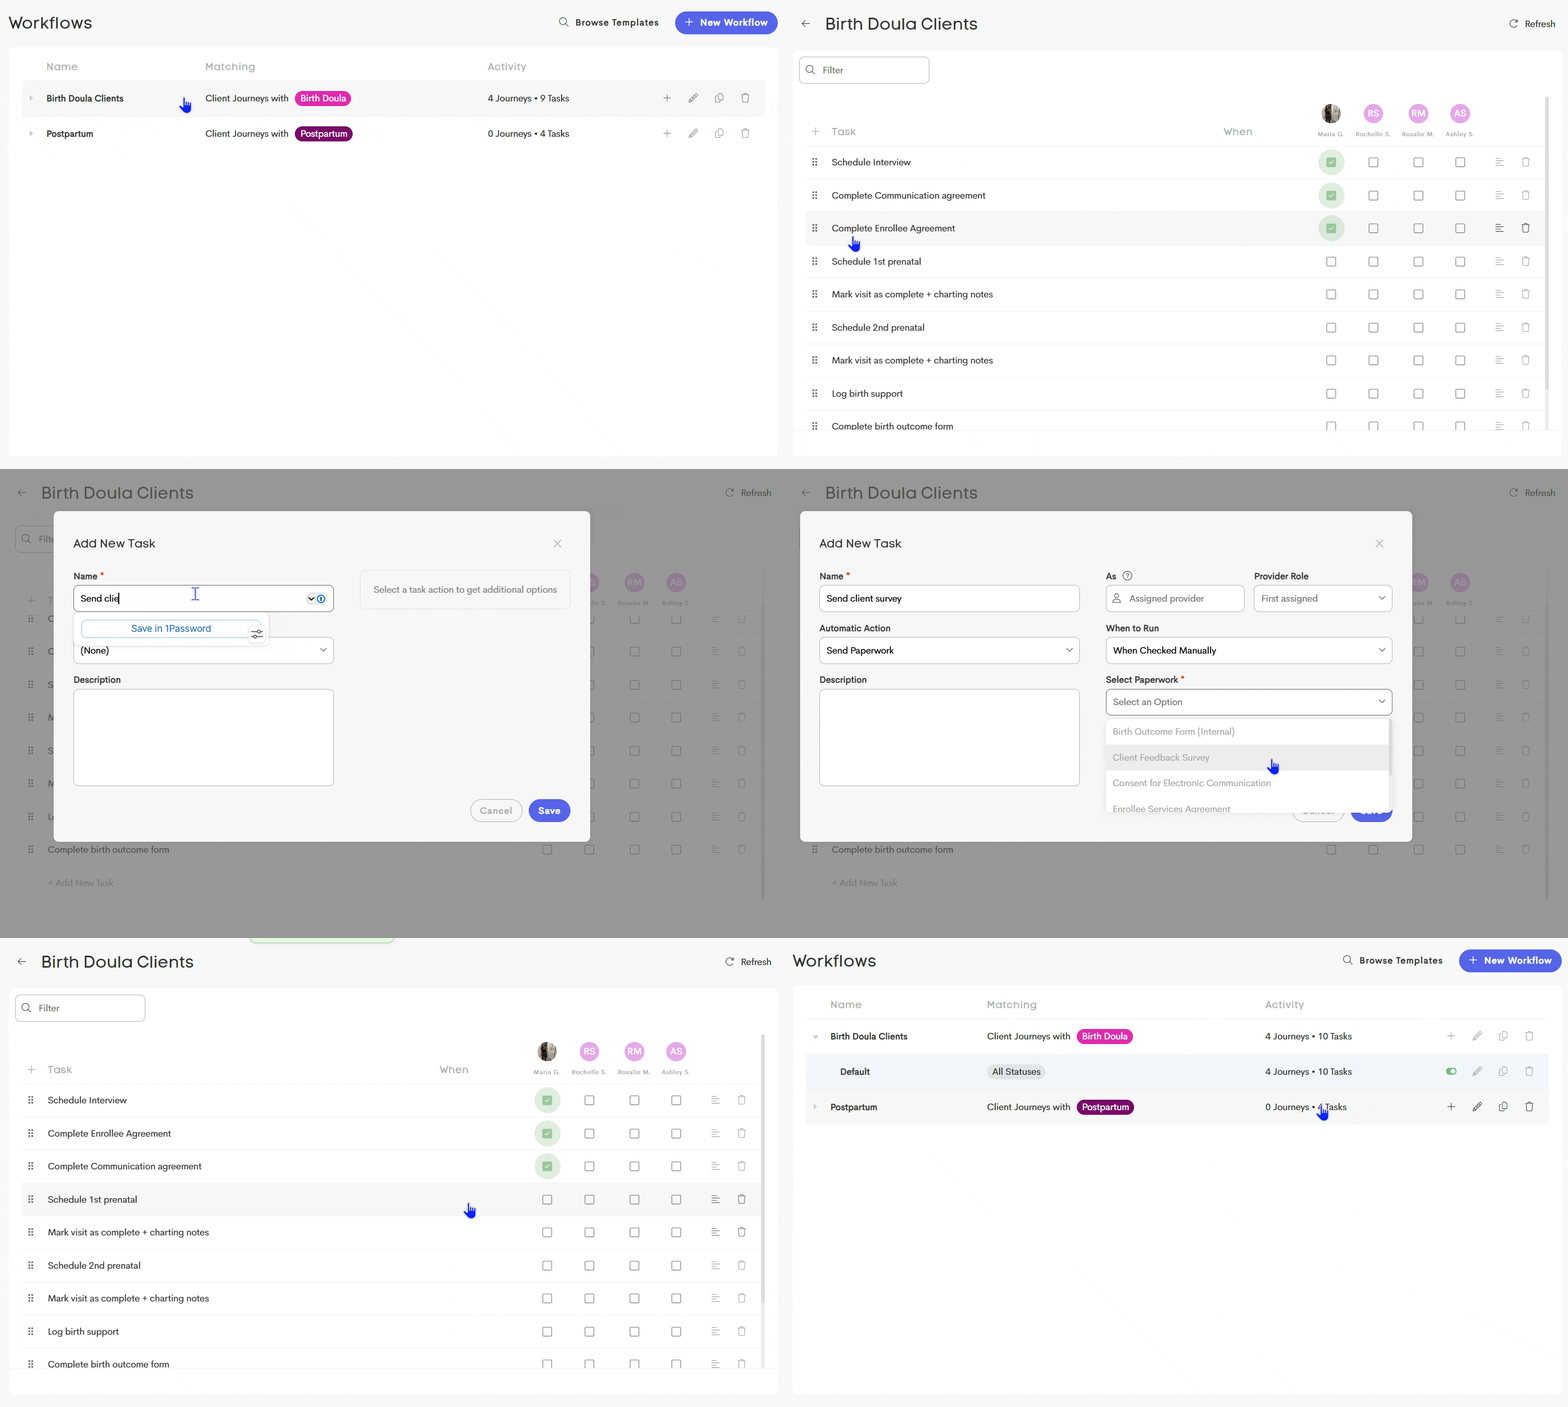
If a task's action is set to (None), it will function as a standard checklist item that must be completed manually. If you'd like the task to complete automatically, see Adding Automated Tasks.
When you're finished making changes, turn the phase back on using the On/Off toggle. Any eligible automated tasks may run once the phase is active again.