
Customizing a Client's On-Call Window
You can adjust the on-call window for a specific client at any time throughout their journey.
Changes can apply to all assigned providers or only to your personal on-call window, giving you flexibility to manage backup coverage, time off, or schedule changes.
Follow these steps to change the on-call window by client:
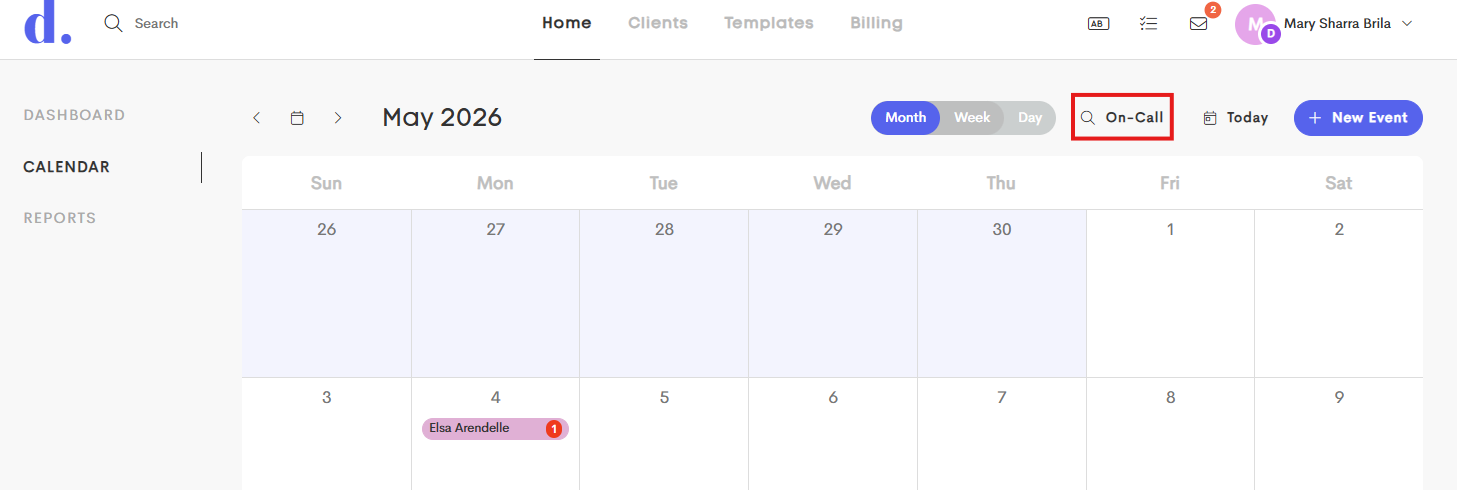
- Go to your Calendar from the main Home tab.
-
Click on the On-Call Window button.
-
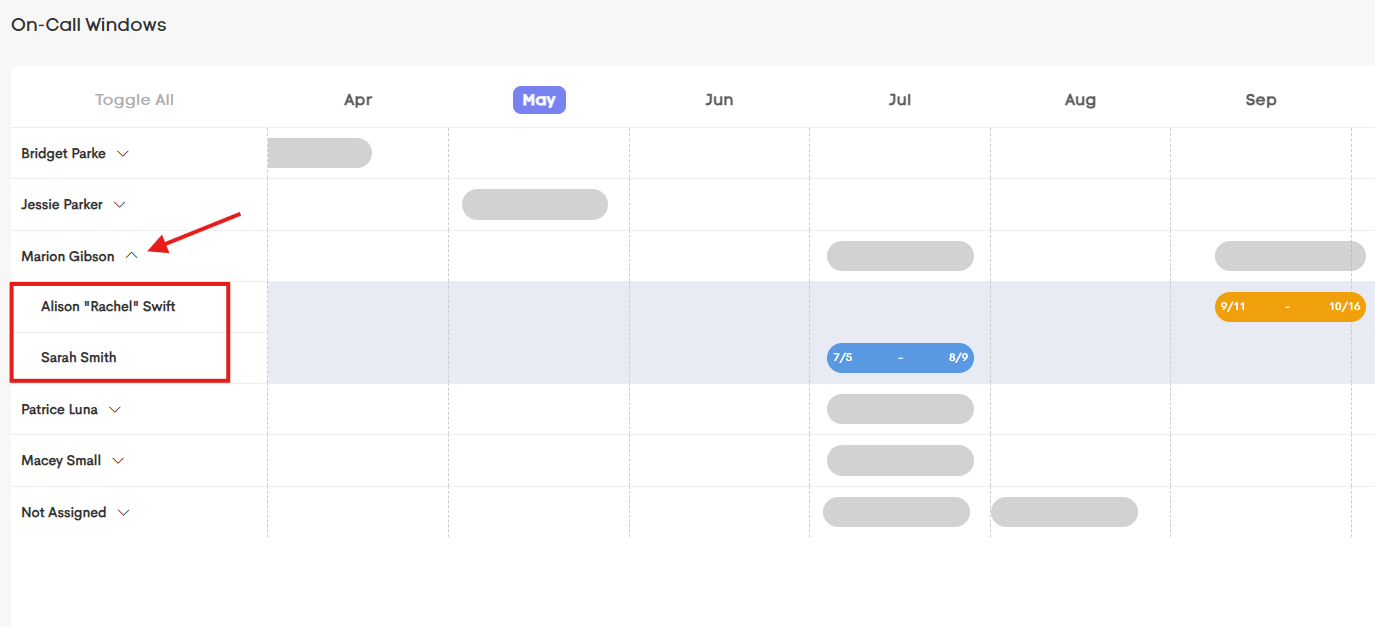
In the On-Call Windows dashboard, click on a doula to reveal the clients they're assigned to.
-
Click on a client's corresponding cell in the calendar sheet to open and update their on-call window.
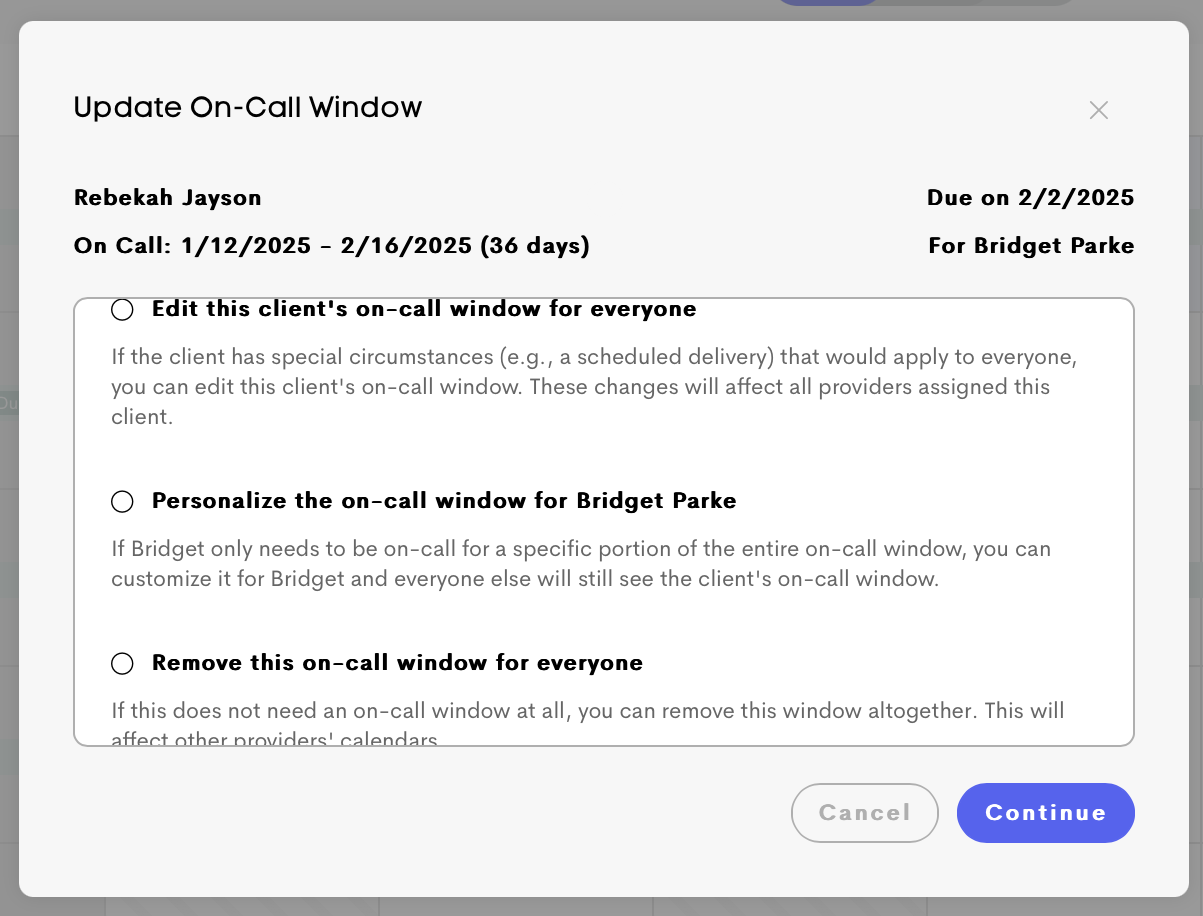
- Select one of the three options based on how you want to edit this client's on-call window.
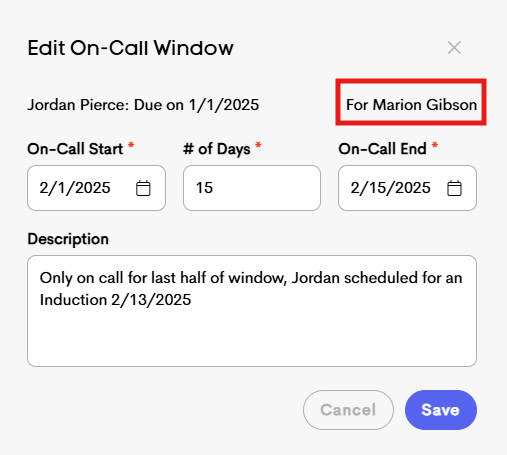
- Edit this clients on call window for everyone:
- If a client has special circumstances (such as a scheduled induction or planned delivery), you can update that client’s on-call window for all assigned providers. These changes will apply to everyone assigned to the client.
-
Enter a new start date, end date, or number of days, and Doulado will automatically calculate the time range. You can also add a description to explain the reason for the adjustment.
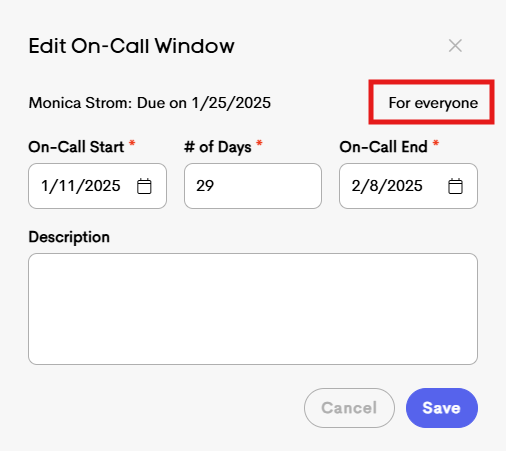
The description will show up below the on call dates when the on call window is opened back up.
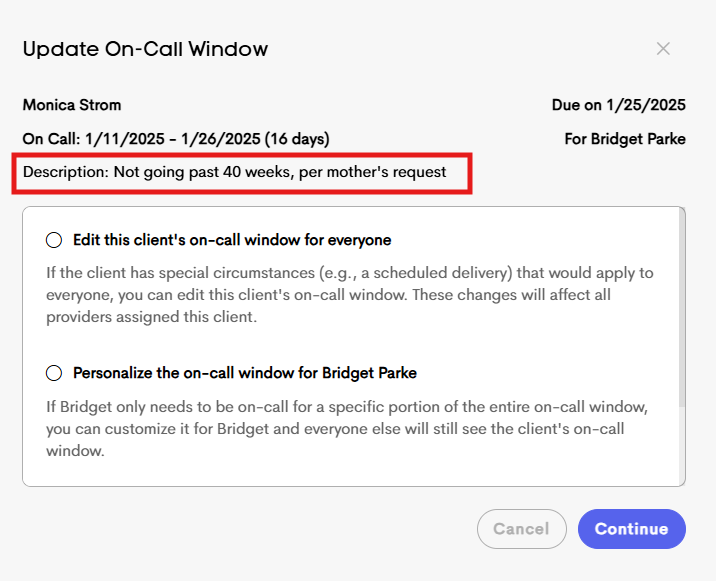
- Personalize this one call window for yourself:
- If you only need to be on-call for part of a client’s overall on-call window, you can create a personal on-call window just for yourself. Other assigned providers will still see the full client on-call window.
-
Enter your adjusted on-call dates, and the changes will only affect your schedule and calendar view. This is especially helpful for doula partners, backup doulas, or partial coverage schedules.
After creating a personalized on-call window for yourself, reopening the Edit window will give you the option to add another personalized window or remove an existing one.
This is helpful if your on-call coverage is split into multiple time periods instead of one continuous block.
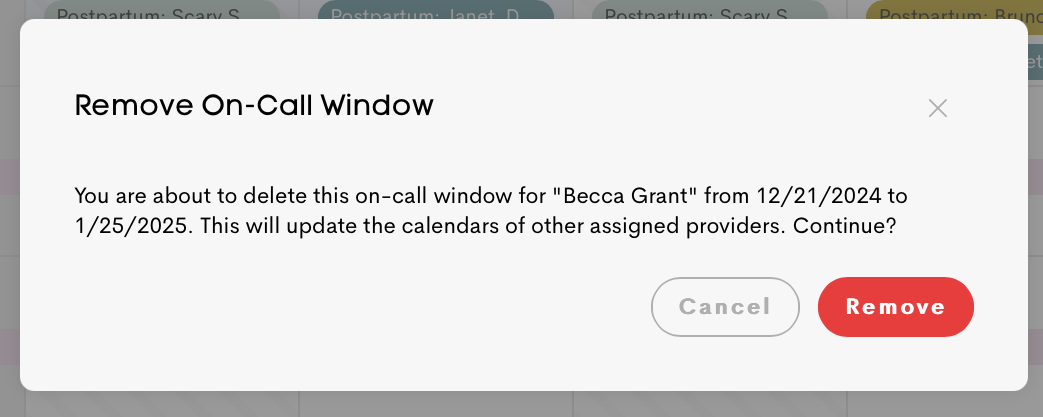
- Remove this on-call window for everyone:
-
If an on-call window is no longer needed, you can remove it entirely.
This will remove the on-call window from all assigned providers’ calendars and from the main on-call calendar view.
This is especially helpful for clients who have a due date but do not require true on-call coverage based on the services being provided.
-
- Edit this clients on call window for everyone:
- Click Save to finalize your changes on the client's on-call window.


Each time you save your changes, a notification will pop up to let you know if the updates you are about to make will effect other calendars.