
On-Call Windows Settings & Display
On-call windows are automatically generated for clients in Lead or Active status once a Due Date is added to their profile.
To modify the settings on your on-call window, follow the steps in each section.
Table of Contents
On-Call Personal Settings
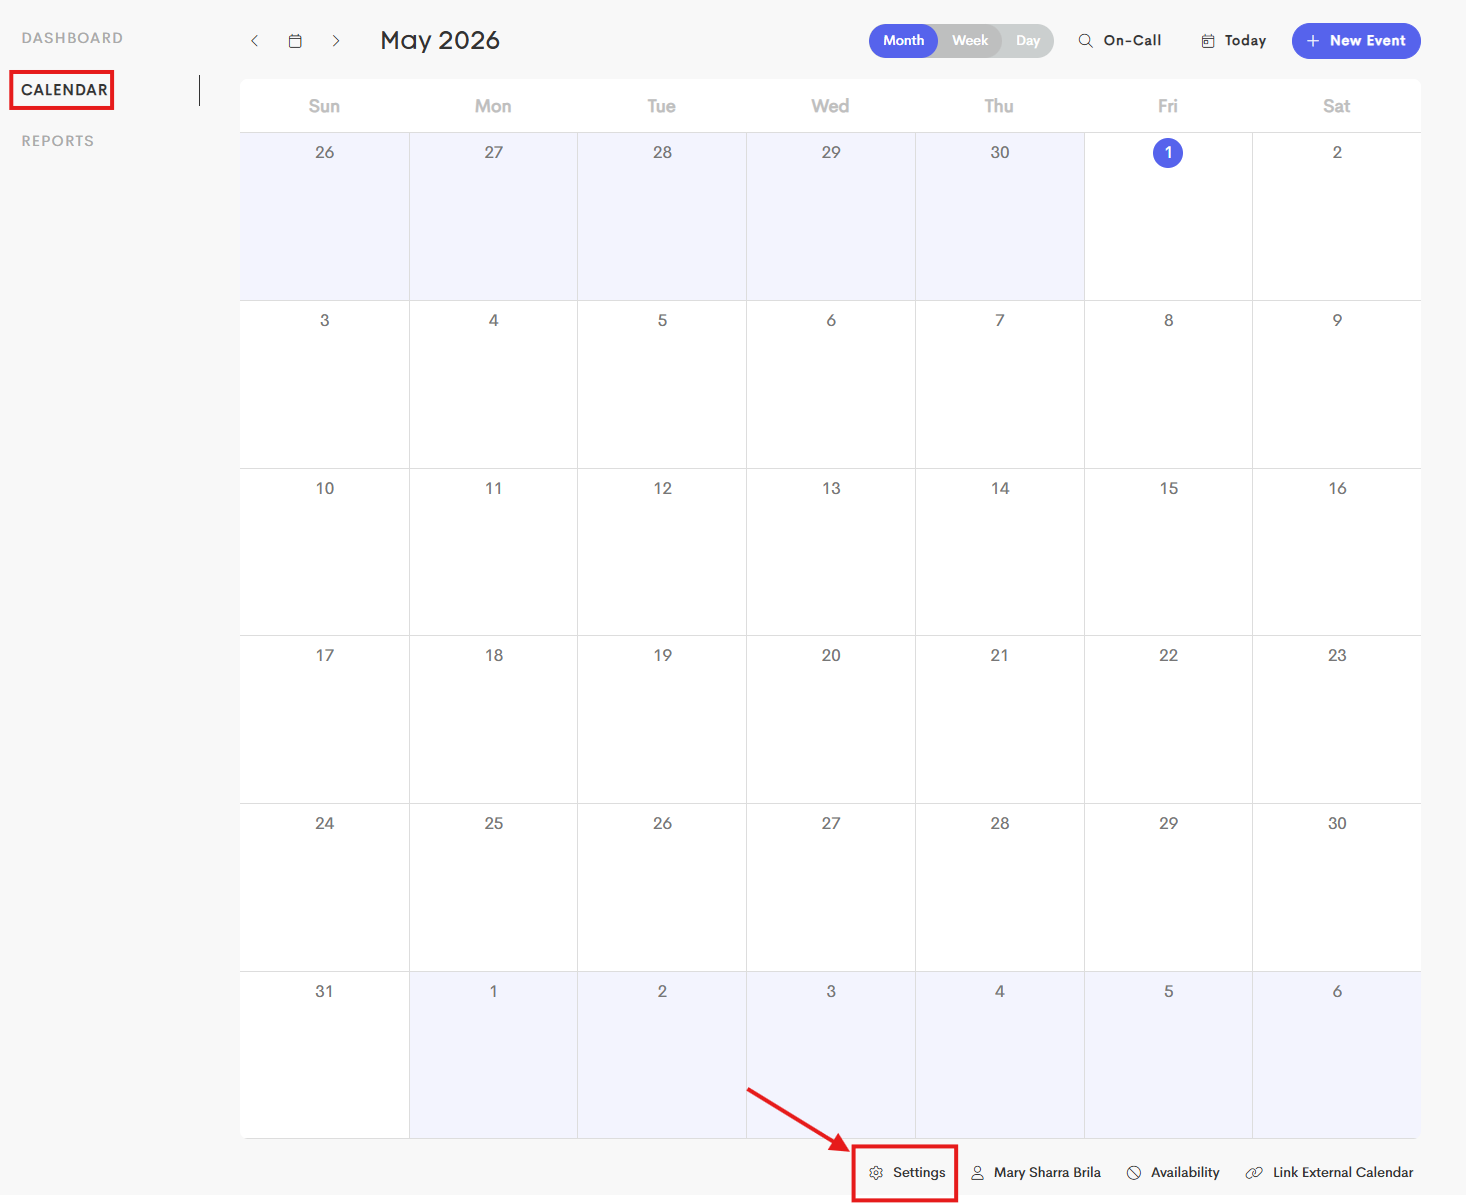
- Go to your Calendar from your Home Dashboard.
-
Click on the Settings at the bottom of the calendar.
-
Under the Personal Settings tab, scroll down until you reach the On-Call Windows section.
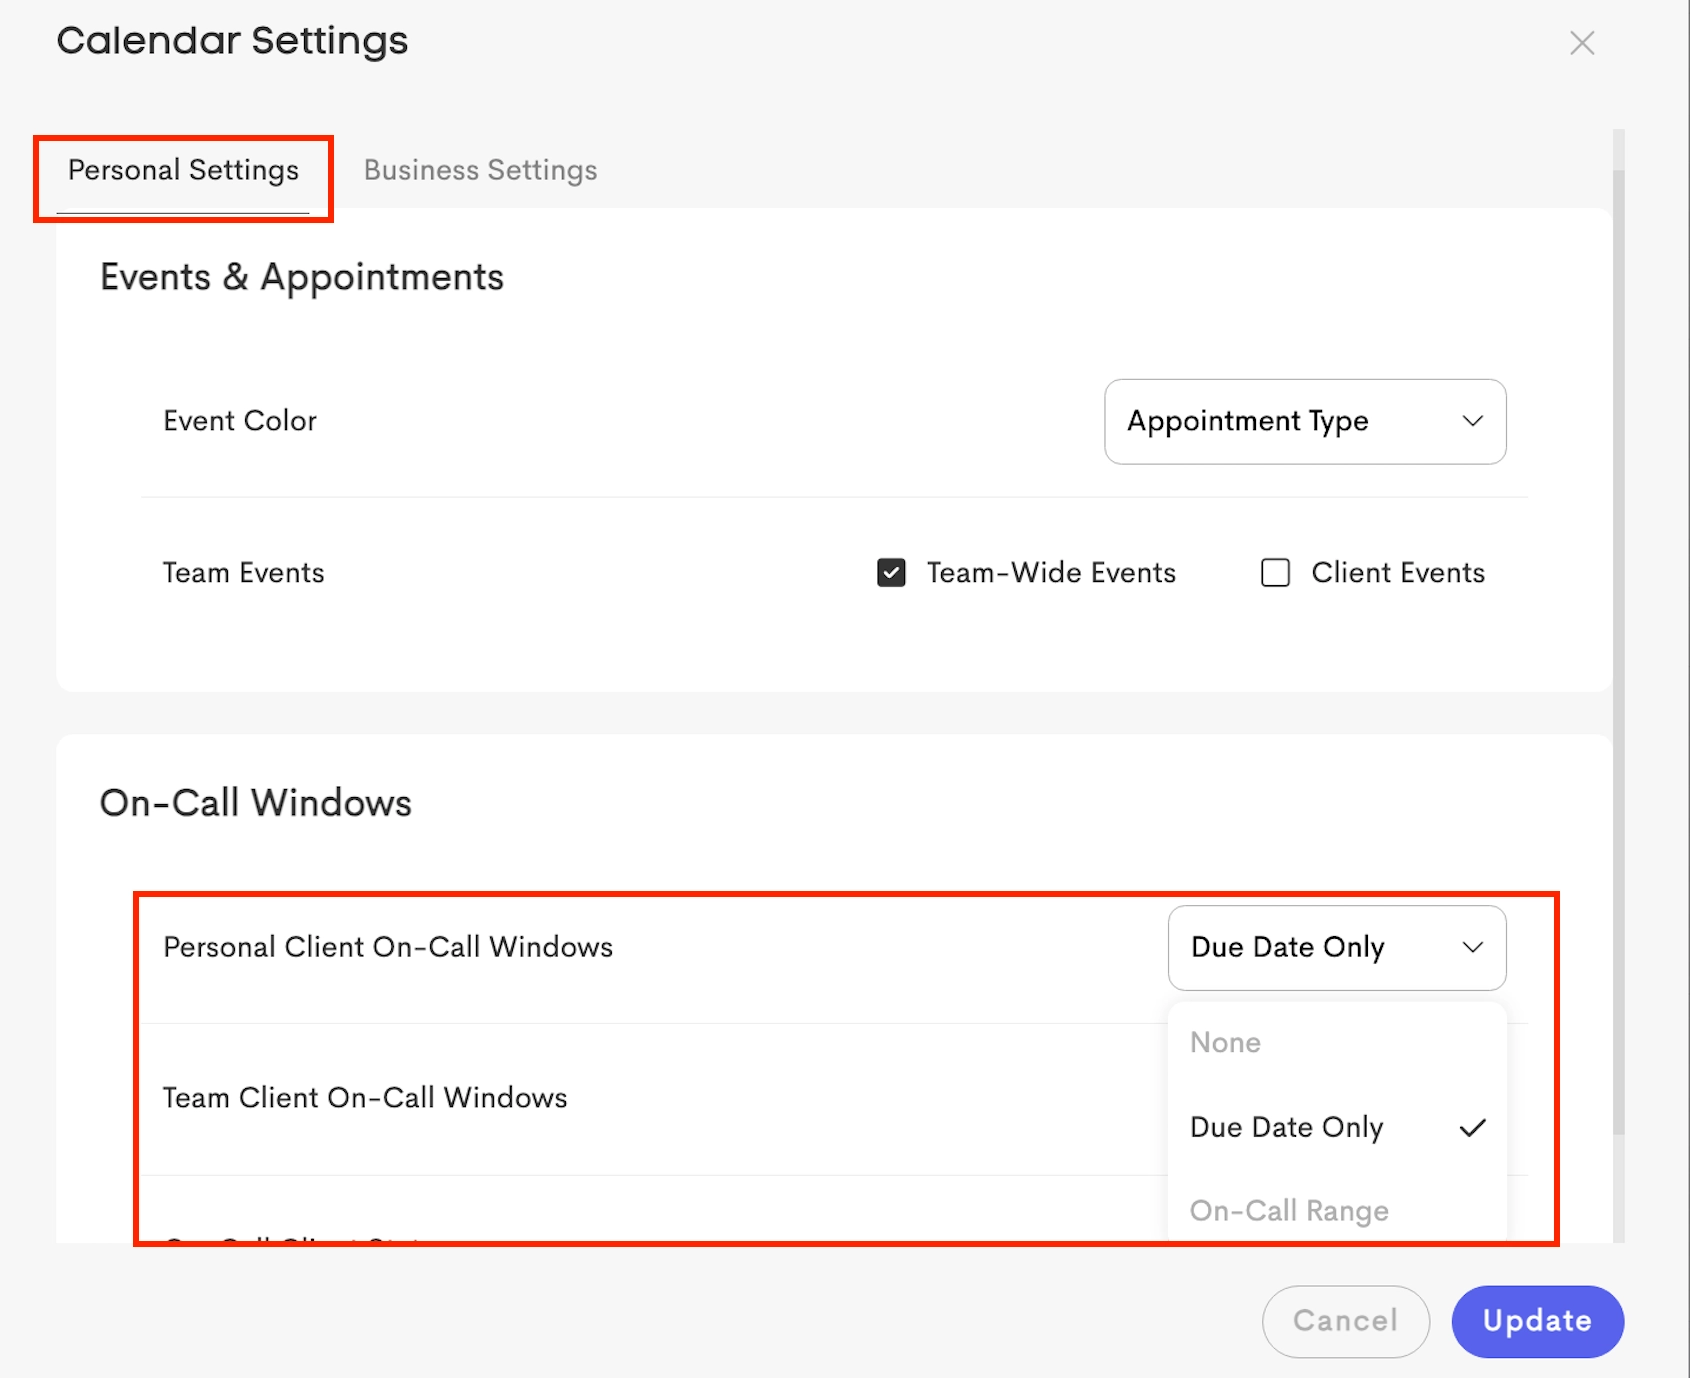
- Choose a setting from the drop down for each:
- Personal On-Call Windows: Control how on-call windows appear for your own clients.
- Team On-Call Windows: Control how on-call windows appear for clients assigned to other team members.
- Client Status Filter: Choose which client statuses are included in on-call window displays.
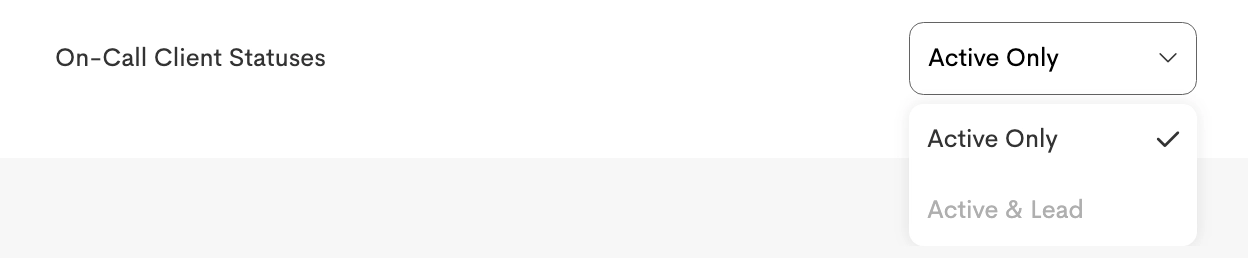
- Under On-Call Client Statuses, you can choose which client type is included in your on-call view:
- Active Only: Shows on-call windows for active clients only
-
Active & Lead: Includes both active and lead clients in your on-call view
- Choose a setting from the drop down for each:
- Click Update once you're done.


On-Call Window Settings as Displayed in the Calendar
Due Date Only
This shows only the client's due date without a multi-day window.

On-Call Range
This displays the full calculated on-call window period range.

On-Call Business Settings
-
In the Calendar Settings, go to the Business Settings tab.
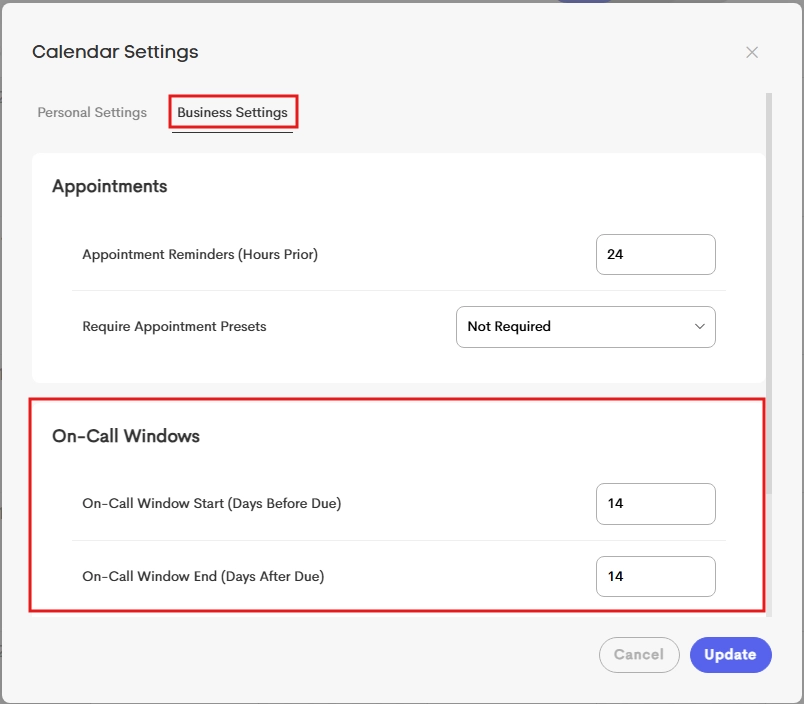
- Proceed to the On-Call Windows section and modify the following:
- On-Call Window Range: Set the default on-call period for your business around a client’s due date:
- Start: Number of days before the due date
- End: Number of days after the due date
- Click Update to apply the changes.

