
Assigning Clients to Team Members or Other Doulas
Clients can be assigned to a provider from the following methods:
- within the Team Settings (if you're assigning a client to a team member)
- the Client List view
- a Client Profile on the Overview section
Sharing a Client from the Team Settings
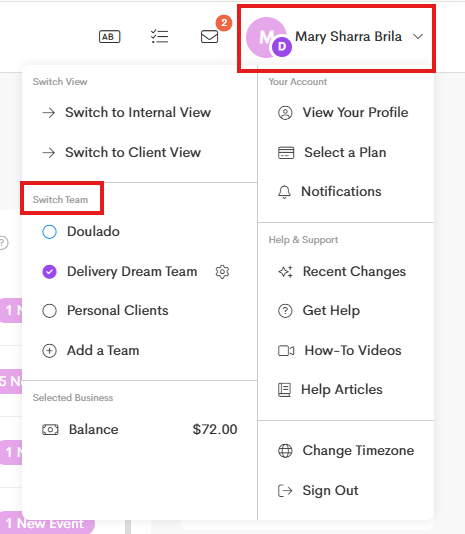
- Click on your User Menu on the upper-right corner.
-
From the Switch Team section, choose a team to open and click on the Gear button beside it.
-
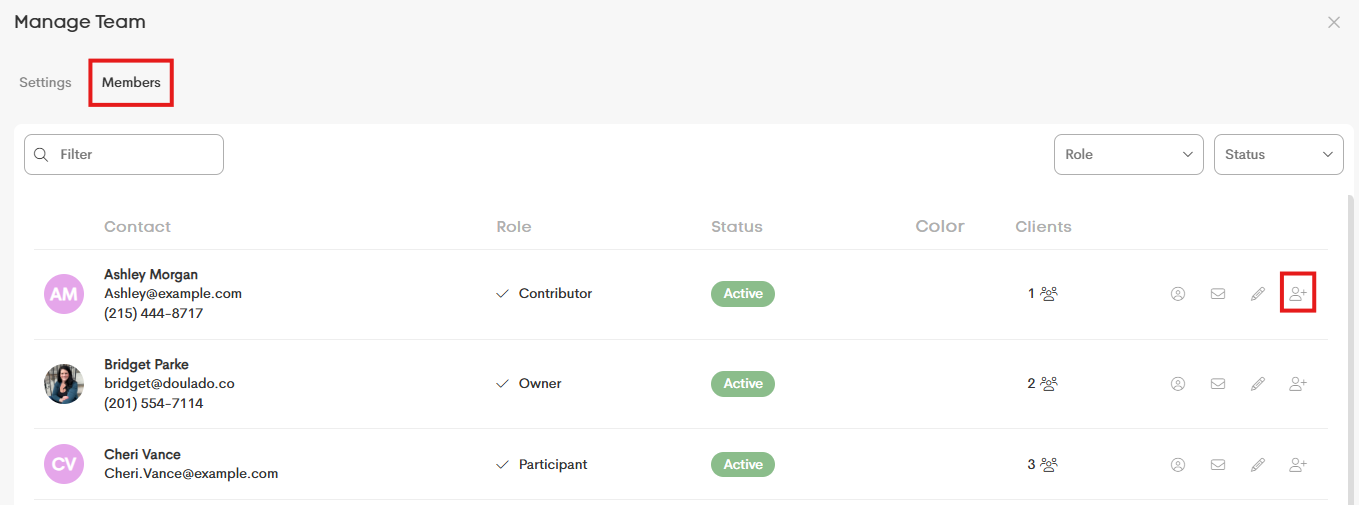
On the Members tab, select a provider you're assigning a client to and click on the Assign icon on the right action menu.
-
Use the dropdown menu to select the client, choose the provider's permission level with that client profile, and assign a role from the dropdown menu (or type in your own custom role).

- Click Save once you're done.


Sharing a Client from the Client List
- Go to the main Client List on your Client tab.
- Find the client you're assigning to a provider.
-
Click on the Assign icon from the right action menu.

-
In the Share modal, fill out the following details:
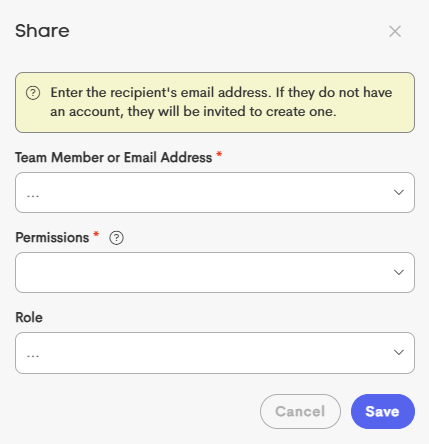
- Team Member or Email Address: You can enter a doula's name or email address, or choose from the dropdown.
- Permissions: Select a permission level to give the provider.
- Role: Assign the provider a role for this event, you can either type a custom role or choose from the dropdown.
- Click Save once you're done.


Sharing a Client from the Client Profile
- Go to the main Client List on your Client tab.
- Find the client you're assigning to a provider and click on their profile.
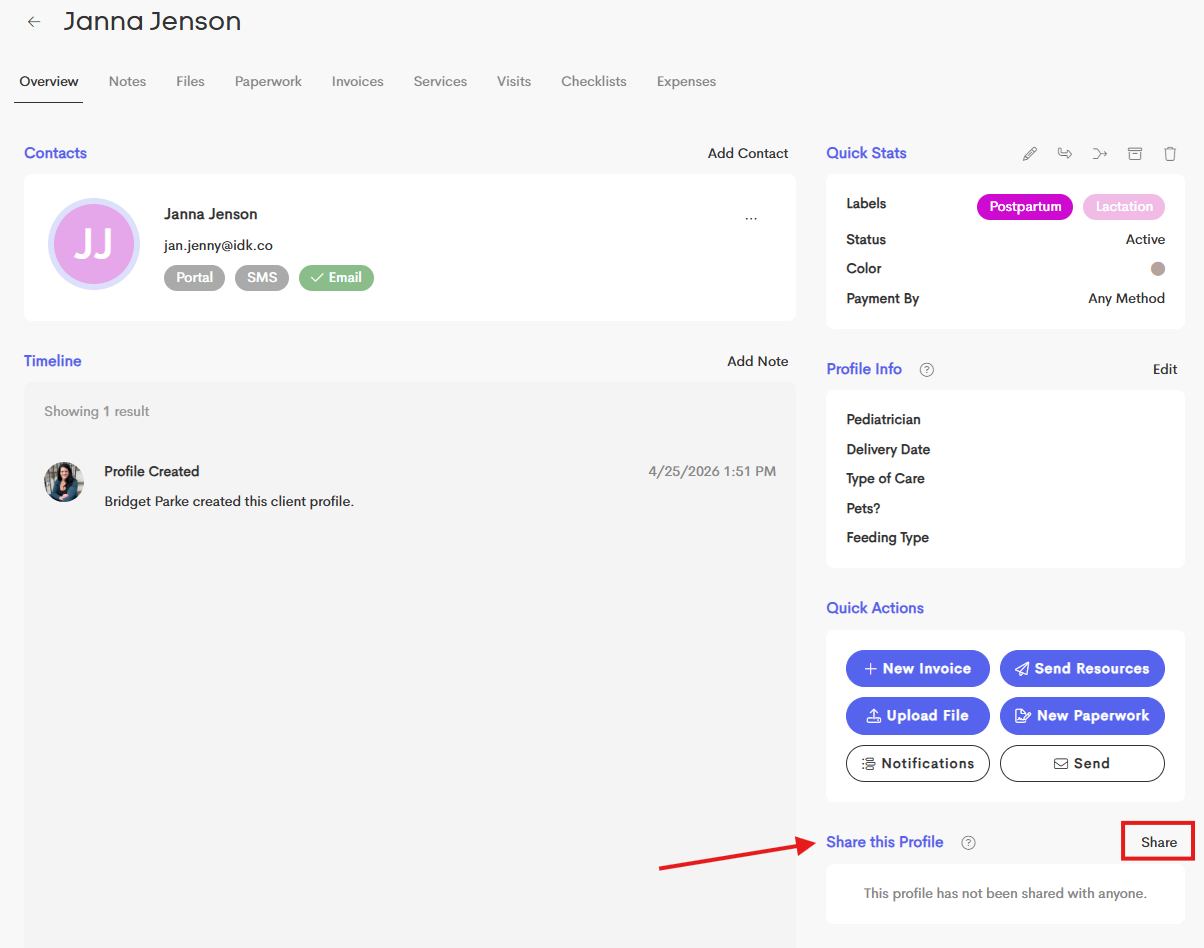
- On the Overview tab, scroll down to the bottom right corner of their profile
-
Click Share in the Share this Profile section.
-
-
Complete the necessary details in the Share modal.
- Use the dropdown menu to select a team member or you can enter an email address to invite.
- Choose the team member's permission level with that client profile.
- Assign a role from the dropdown menu or enter a custom role.
- Once you're done, click on Save.

Permission Levels when Sharing a Client Profile
|
|
View Only |
View & Edit |
Edit & Share |
| View profile |
✅ |
✅ |
✅ |
| View Notes (unless 'private note') |
✅ |
✅ |
✅ |
| Message client |
✅ |
✅ |
✅ |
| View Files |
✅ |
✅ |
✅ |
| View Completed Paperwork |
✅ |
✅ |
✅ |
| Edit Personal On Call Window |
✅ |
✅ |
✅ |
| Schedule Visits |
✅ |
✅ |
✅ |
| View Eligibility Verification Log |
✅ |
✅ |
✅ |
| View Invoices (if Invoice settings allow) |
✅ |
✅ |
✅ |
| View Insurance Coverage |
✅ |
✅ |
✅ |
| Add notes |
|
✅ |
✅ |
| Send/Upload Files |
|
✅ |
✅ |
| Send New Paperwork |
|
✅ |
✅ |
| Create Invoices (if Invoice settings allow) |
|
✅ |
✅ |
| Edit Services |
|
✅ |
✅ |
| Utilize Checklist |
|
✅ |
✅ |
| Edit Everyone’s On Call Window |
|
✅ |
✅ |
| Change Client Status/Label |
|
✅ |
✅ |
| Edit Profile Info |
|
✅ |
✅ |
| Send SMS Opt-In |
|
✅ |
✅ |
| Add Additional 'Contact' Details |
|
✅ |
✅ |
| Send Custom Notification |
|
✅ |
✅ |
| Log Mileage/Expenses |
|
✅ |
✅ |
| Add/Manage Client Payment Methods |
|
✅ |
✅ |
| Submit a claim (If Claim settings allow) |
|
✅ |
✅ |
| Add Insurance Coverage |
|
|
✅ |
| Edit Client/Contact Relationship |
|
|
✅ |
| Share Client Profile with others |
|
|
✅ |
| Enable Client Portal |
|
|
✅ |